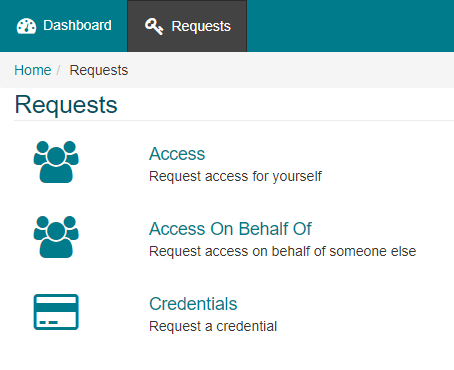
Requests
The Requests tab of the application is available to all users, including users that have no user role assigned to them. This page is designed to allow users to:
- Make access requests.
- Request access on behalf of other users.
- Request a new Credential for themselves or on behalf of others.
- Manage Access Requests (ACR/ACRM users only).
- Manage Credential Requests (Photo ID Admin/Tech users only).
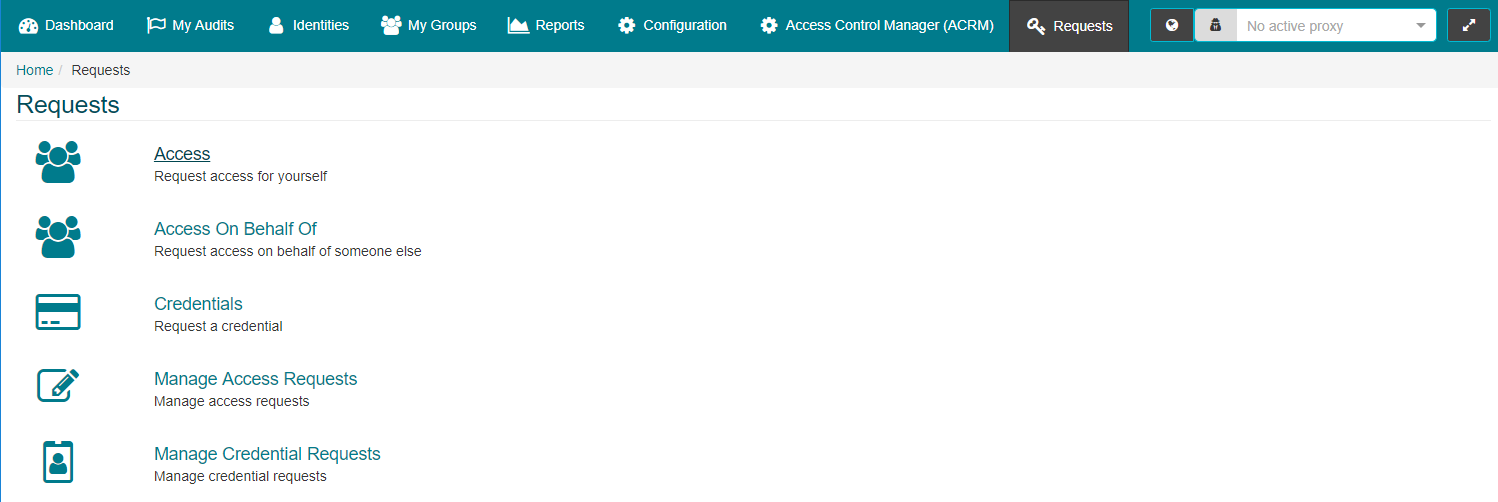
If Access/Credential Requests are enabled then any active user will be able to access to the Requests tab.
- For more information regarding the configuration of Access and Credential Requests, please review the Requests section of this guide.
Access:
- While some Access Groups may be assigned to Identities automatically via an Access Group Rule, users can request access to specific areas by navigating to CONNECT Requests Access.
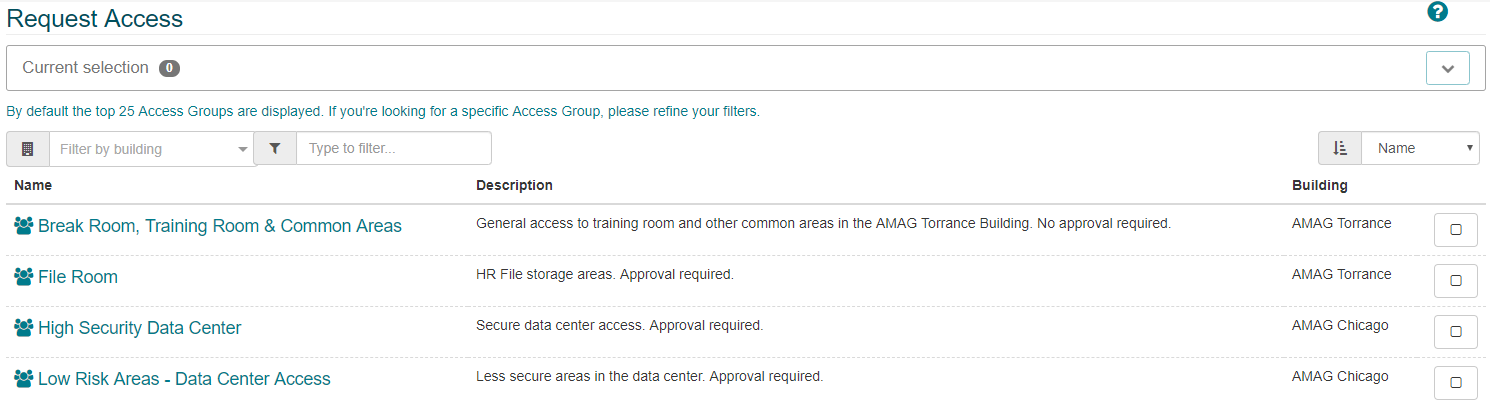
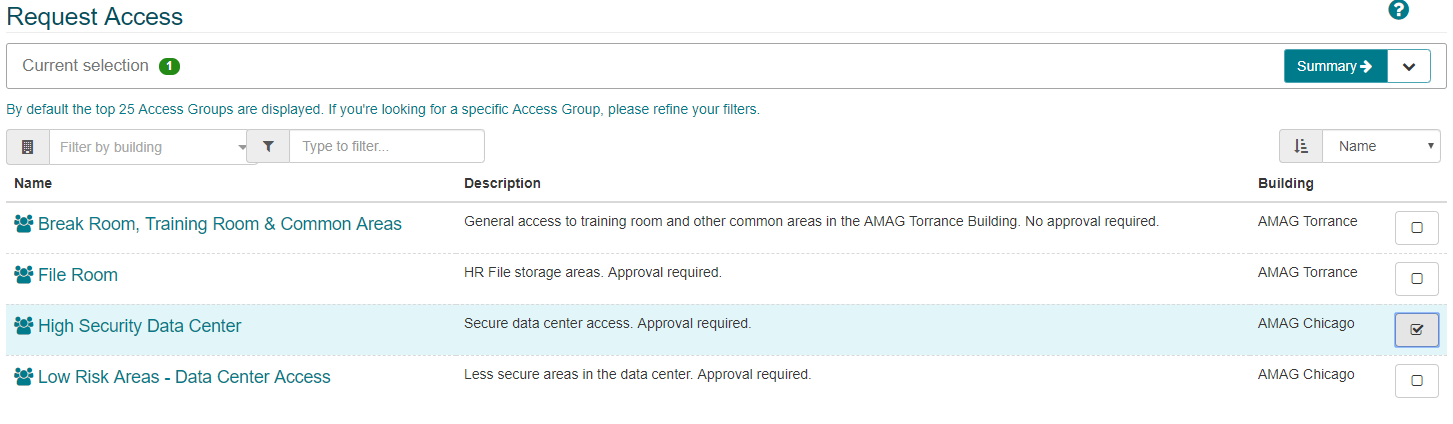
- The user is presented with a list of Access Groups which can be filtered using the search field, or filtered by Building. The sort list can also be changed using the drop down on the right.

- The user is able to select multiple Access Groups. The selected groups can be managed using the arrows to view/remove the selected Access Groups as required.

Making an Access Request:
- Use the Search/Filter options to find the required Access Group (or multiple Groups), then click Summary.
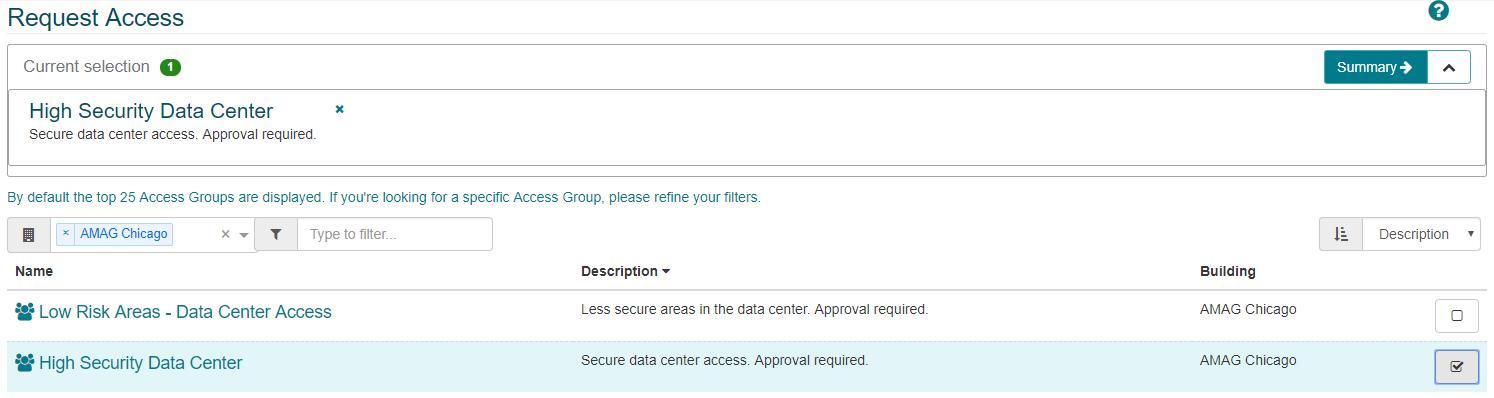
- Selecting the icon will provide additional help-text in a pop-up box. The text is entirely configurable by the customer.
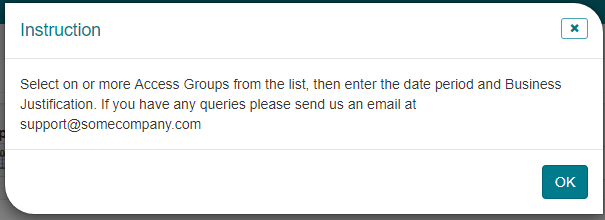
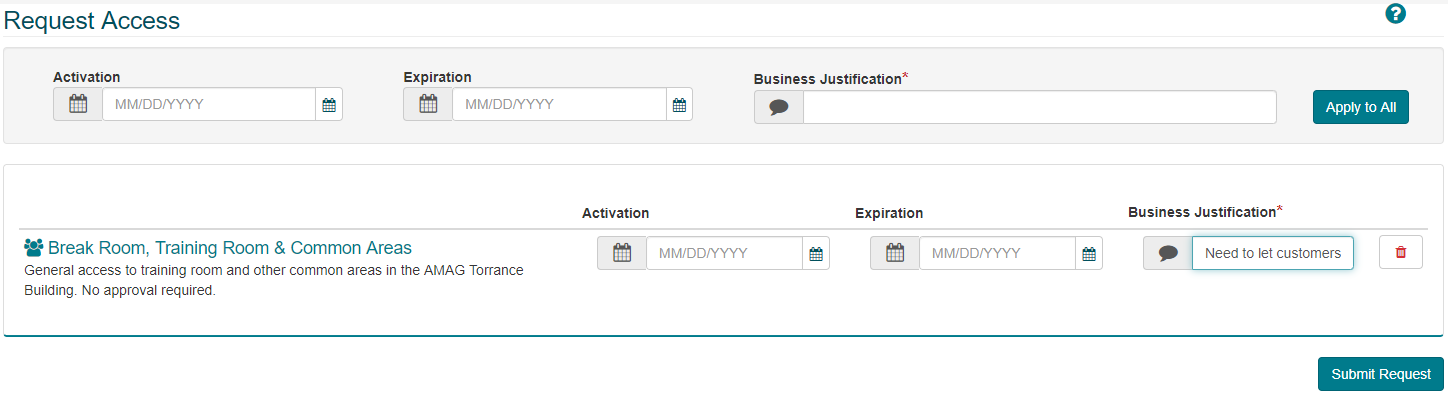
- Enter the required information, such as the Activation/Expiration dates and a Business Justification (reason why access is required).
- If multiple Access Groups are being requested, the user can enter the information into the fields at the top, then click Apply to All to populate each individual Access Group.
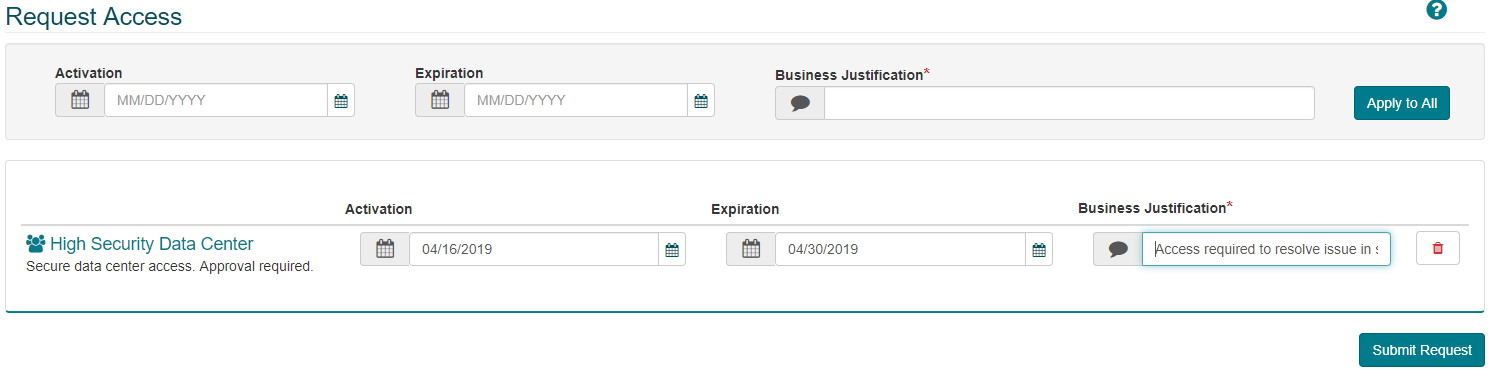
Common configuration of an Access Request is shown above. Actual visible/required fields may vary depending on configuration.
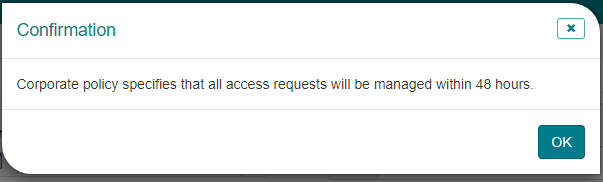
- Click Submit Request. Typically a pop-up will appear with company-specific policy text. Click OK to continue.
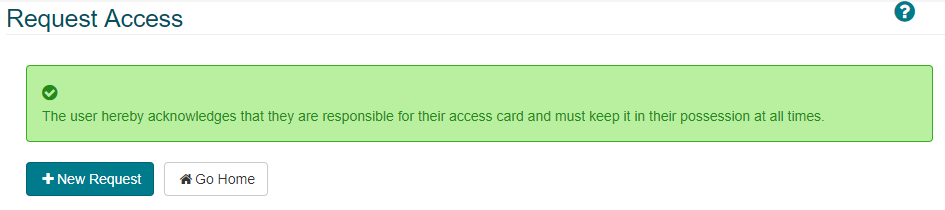
- A final acknowledgement containing customer-specific text is shown. The user is able to make a new request or return to the home screen.
- The user will receive an email confirmation that an Access Request was made.
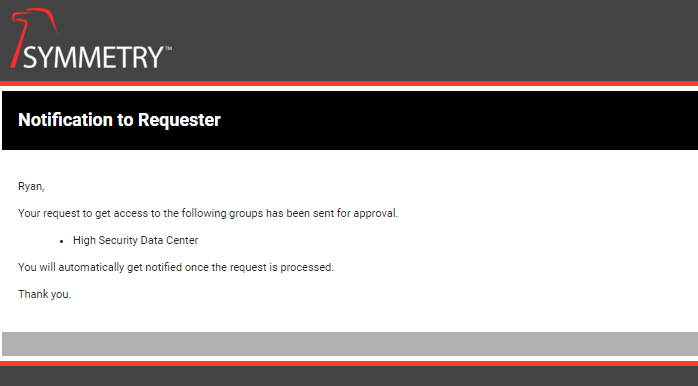
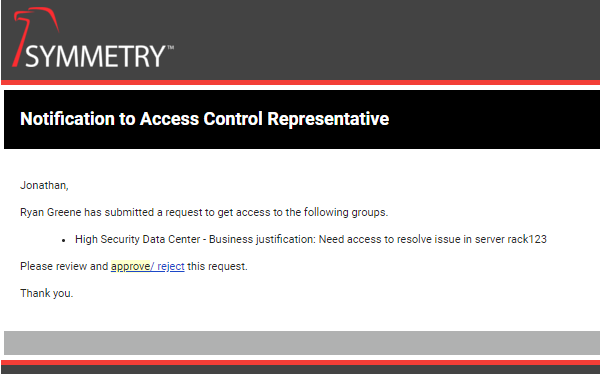
The ACR and ACRM assigned to the Access Group will receive an email notification informing them of the new Access Request. Please refer to the [Manage Access Requests] (/connect/requests/) section below for more detail on this process.
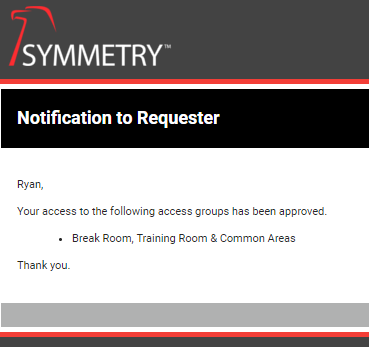
Access Request (No Approval Required): Some Access Groups do not require approval and will be automatically assigned to the user if requested. The request process is the same as described above, however there is no corresponding approval required and the Access Group is assigned automatically.
- The request below is for an area that does not require approval.
- The user will receive an email notification informing them the Access Group has been assigned.
Access On Behalf Of:
- It is possible for users of the system to make a request for access On Behalf Of other Identities. The process is very similar to that of a normal access request (described above).
- To make an access request for another Identity, click the “Access On Behalf Of” link on the CONNECT Requests tab.
- The user is presented with a list of active Identities. They can select one or more Identities from the list as required.
- The list can be searched/filtered/sorted in the same way as other pages (described previously).
- Select the required Identity and click the “Selected” button.
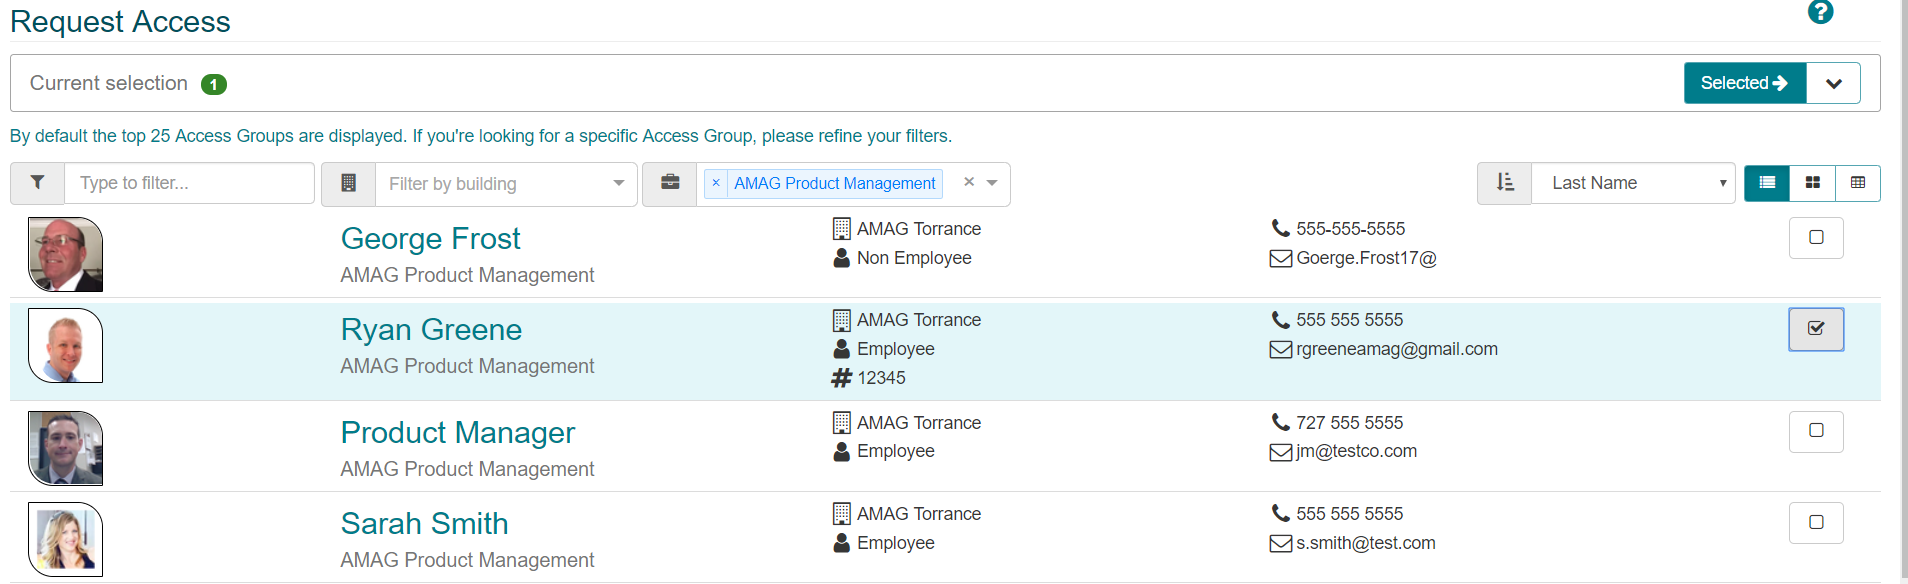
The list of Identities shown above will populate according the “Company Partitioning” configuration of the application. The user may only be able to see Identities from their own Company, or from a few selected Companies depending on configuration. For more information, please review Company Partitioning in the IDM Administrator Guide.
- The next steps are identical to a typical access request (described previously). The user will select the Access Group required and proceed to the next screen.
- Enter the required information and click “Submit Request”.
- The user will see an acknowledgement and a policy statement. The user will receive an email confirmation that an Access Request was made. At this stage the relevant ACR and ACRM receive an email notification informing them of the new Access Request.
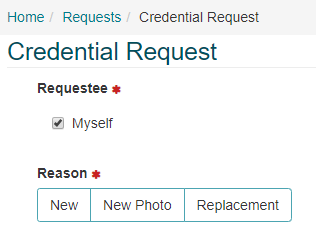
Credentials:
- Credentials (access cards) can be assigned to Identities by a Photo ID Badge Admin/Tech user. Credentials may also be requested by users of the system (if configuration allows) by navigating to CONNECT Requests Credentials.
- The user is able to make a Credential Request for themselves, or they can request a Credential on behalf of other Identities (uncheck “Myself”).
- The user must provide a “Reason” for the request. Options include:
-
New: Typically selected by a new employee or their manager to notify the badging office that a new Credential is required.
-
New Photo: Used if the Identity’s photo has expired, or they wish to update their photo in the system.
-
Replacement: If the Identity’s current card was lost/stolen/damaged etc., this option is used.
-
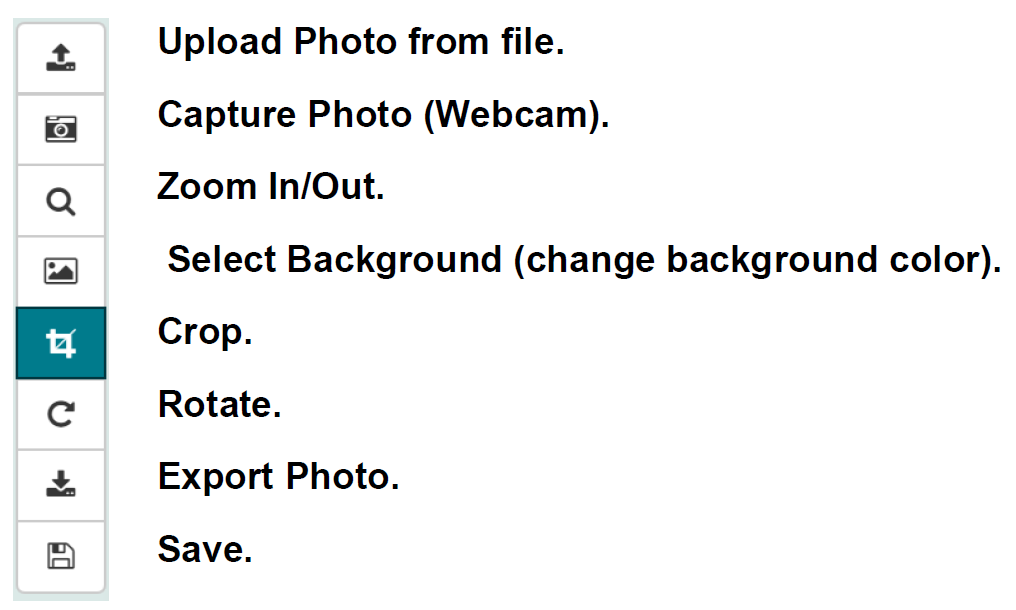
New/New Photo:
- If the Identity selects “New” or “New Photo”, they will be required to capture/upload a photo in order to place the request.
- Once a photo has been uploaded or captured, the user must save the image, then click “Place Request”.

Replacement:
-
If the user selects “Replacement” as the reason for their Credential Request, they are presented with a list of “Replacement Reasons” from which they can select. Note: the default replacement reasons are shown in the image below, however these are configurable and can be changed.

-
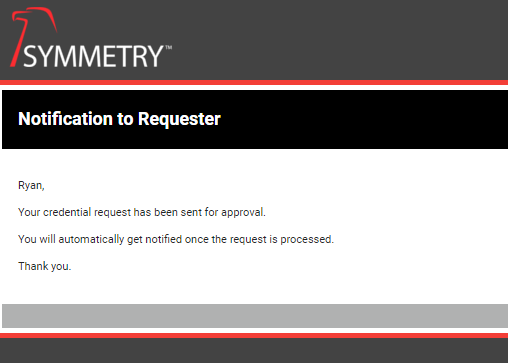
Once the Credential Request has been made the requestor will receive a confirmation email.
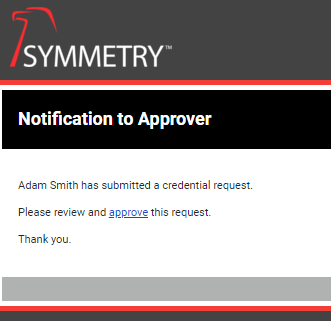
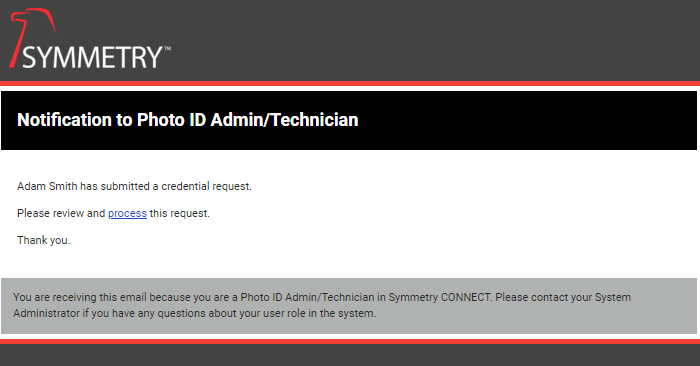
The system can be configured to require the Identity’s Manager to approve their Credential Request. If configured, the manager will receive an email notification. Photo ID Tech/Admin users will receive an email notification informing them of the new Credential Request. Please refer to the Manage Credential Requests section below for more detail on this process.
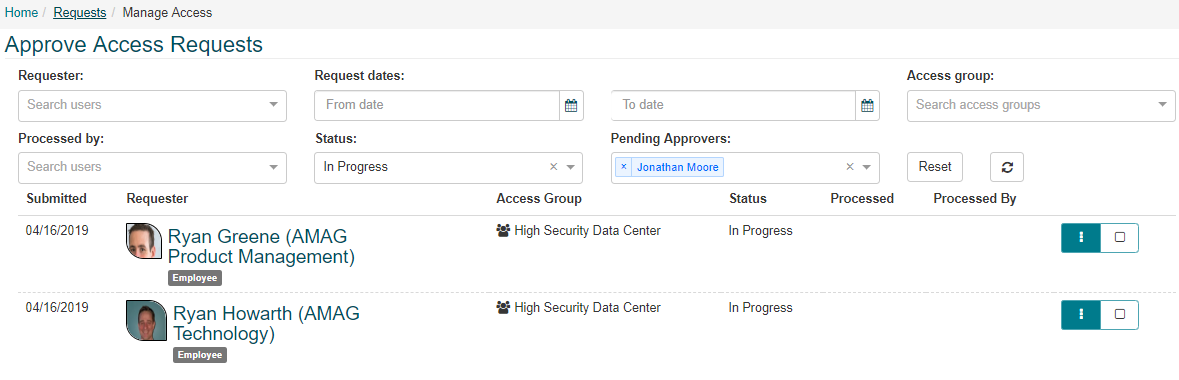
Manage Access Requests:
The system may be configured to require approval from multiple approvers when an Identity makes an Access Request. This section provides an overview of the approval process using the ACR user, who is always required to approve the request. Other approvals follow a very similar process.
- When an Access Request is made, the ACR will receive an email notification.
-
The user clicks the link in the email to be taken directly to the approval page, or they can navigate to CONNECT Requests Manage Access Requests.
- The page allows the user to search/filter the list. Once the user finds the record they need, they click on the details icon to access the record. The user also has the option to select multiple records to process at the same time.
- Click “Approve” to approve the request. If the request is rejected, the user must enter a reason (this is sent to the Identity in the rejection email).
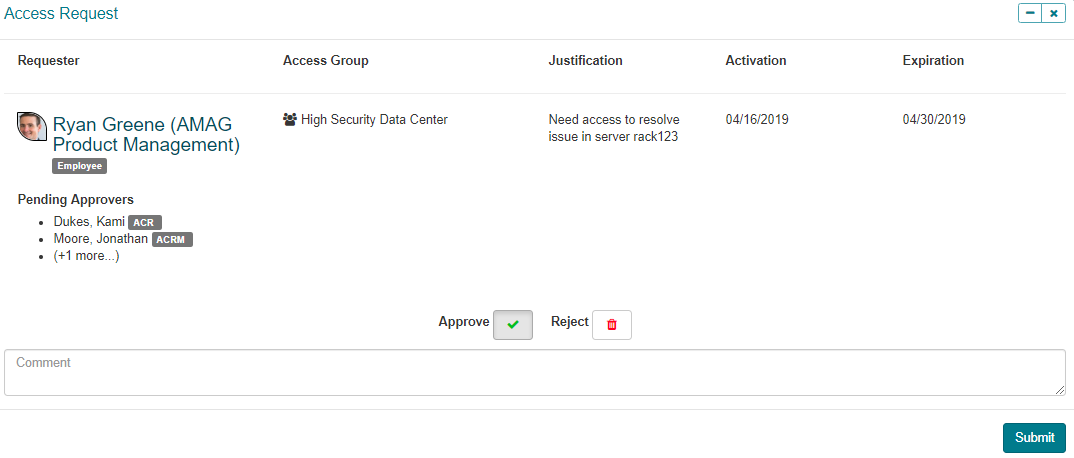
Once approved, the Access Group is assigned to the Identity automatically, only for the approved period of time.
Manage Credential Requests:
-
Depending on configuration, the system may require that all Credential Requests be approved by the Identity’s direct manager before a new Credential can be issued. In this event the manager will receive an email once the Identity completes the Credential Request.
-
The manager can click the link in the email to be taken directly to the Credential Approval page (CONNECT Requests Manage Credentials).
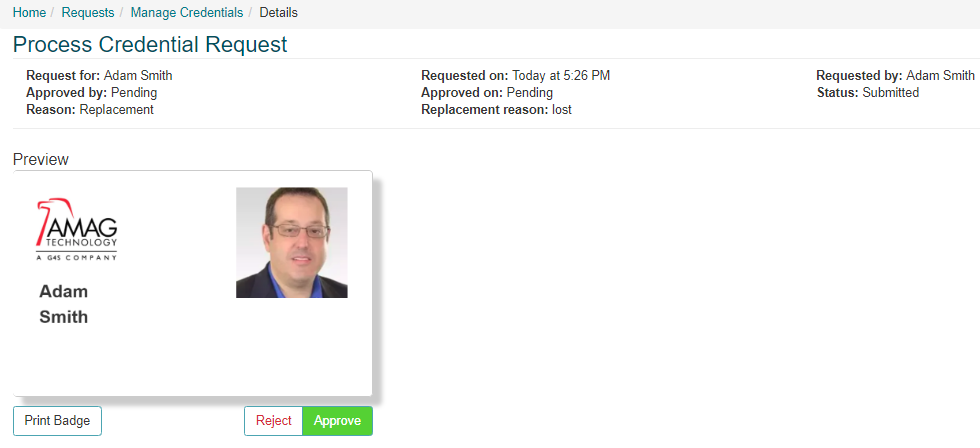
- Once approved the Photo ID Badge Tech/Admin users will receive an email, notifying them of the Credential Request. The user can click the link to be taken directly to process the Credential (CONNECT Requests Manage Credential Requests).
-
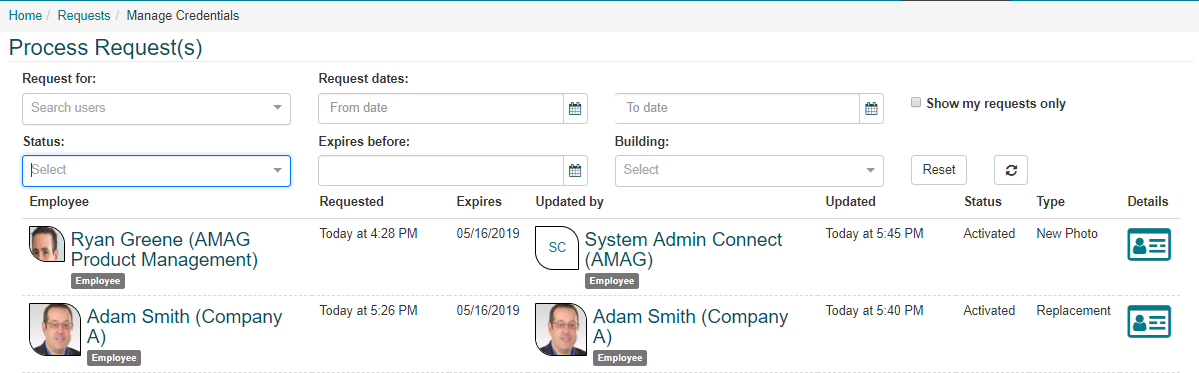
If the user doesn’t click the link, they must manually navigate to CONNECT Requests Manage Credential Requests.
-
The page allows the user to search/filter the list. Once the user finds the record they need, they click on the badge icon to access the record.
-
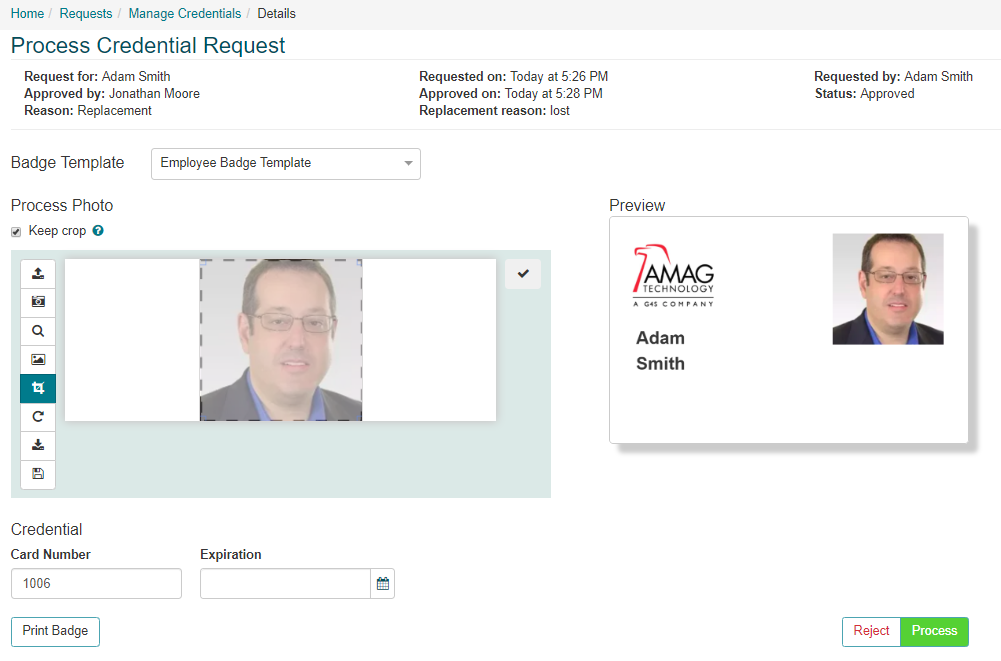
On the next screen the Photo ID Tech/Admin user has the ability to modify the photo (if required). The user is also able to enroll a new Card Number and Expiration (optional).
-
Print the badge, then click “Process” to finish.
-
Manual Credential Activation:
-
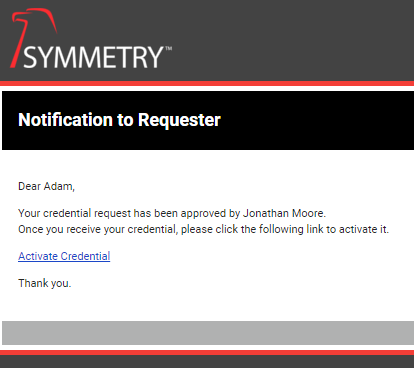
The system can be configured for “Manual Activation” of Credentials, meaning that the Credential is not activated until it has been received by the Identity. Once the Credential has been processed (see steps above), the Identity receives an email notification stating that the Credential has been processed. There is a link in the email allowing the Identity to activate the Credential when they receive it.
-
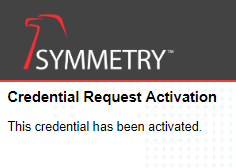
When the Identity receives their credential, they click the link and it is activated automatically.
The Photo ID Admin/Tech user is able to activate the Credential for the Identity (if required) by going to CONNECT Requests Manage Credentials. The user simply selects the record and clicks “Activate”.
Automatic Activation:
- If the system is configured to activate the Credential automatically, then the Credential becomes active immediately when it is processed and the Identity does not receive an email notification.