Setting up Rules
Rules allow for the automation of access assignments based on select criteria. These can be used to assist with both ensuring that identities have the access they need based on location, job description or a number of other criteria as well ensure that access is removed when an identity is not using it or changes positions.
There are four types of rules that can be configured:
- Access Group Rules: Allow for access groups to be assigned based on select criteria
- Auto Approve: Automatically approve access groups to an identity
- Credential Suspension: Automatically removes individual card access when inactive by the user for the time selected
- Use it or Lose it: Automatically removes individual access rights when inactive by the user for the time selected
Access Group Rules
To create a new Access Group Rule:
- Click the CONNECT tab
- In CONNECT, select the Configuration tab
- On the Configuration page, click Rules
- On the Rules page, click Access Group Rules
- On the Access Group Rules page, click the New button in the upper right

- Next enter the following fields:
- Name: How the access group rule will be identified
- Owners: The identity that will own and be responsible for the rule
- Access Conditions: The criteria that must be met to get the Access Group(s)
- Multiple attributes can be applied, in a And fashion
- Selectable Attributes include:
- Building
- Companies
- Department
- Employee Types
- Identity Category
- User Defined Fields
- Access Groups: The access groups that will be assigned if the conditions are met
- Click the Submit button
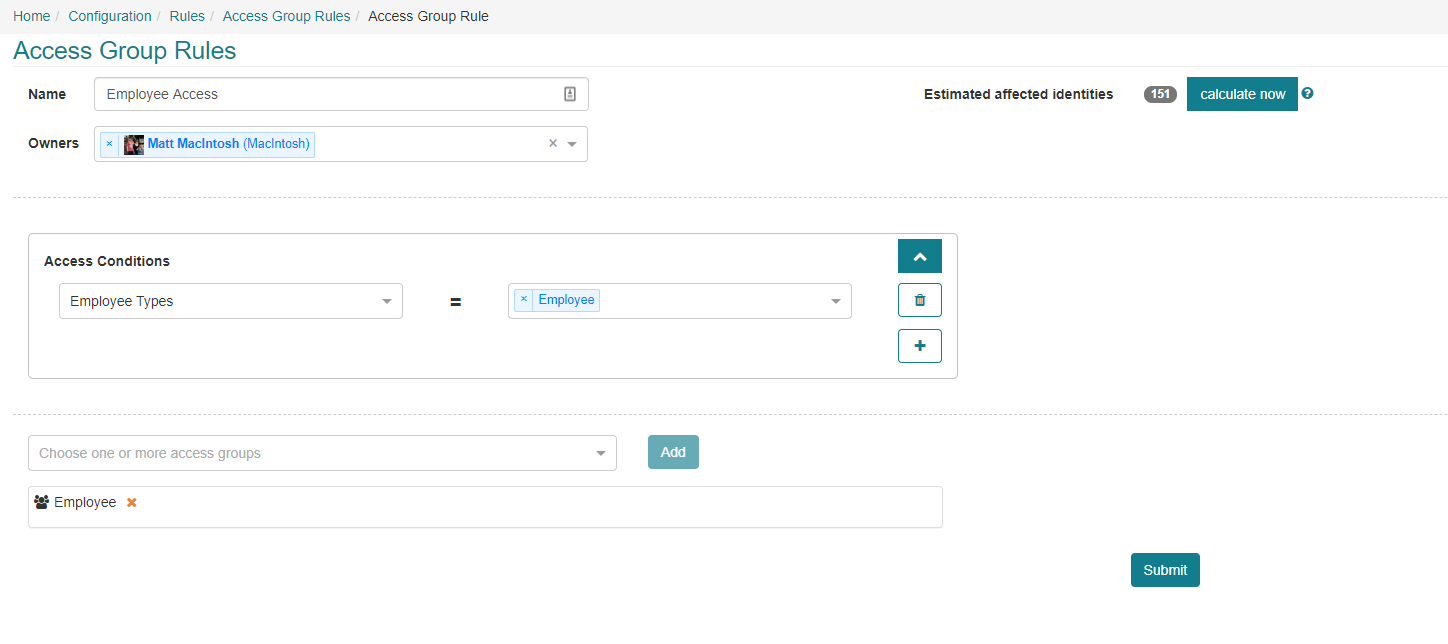
You can see how many identities fit the criteria and will be assigned the access by clicking the Calculate Now button.
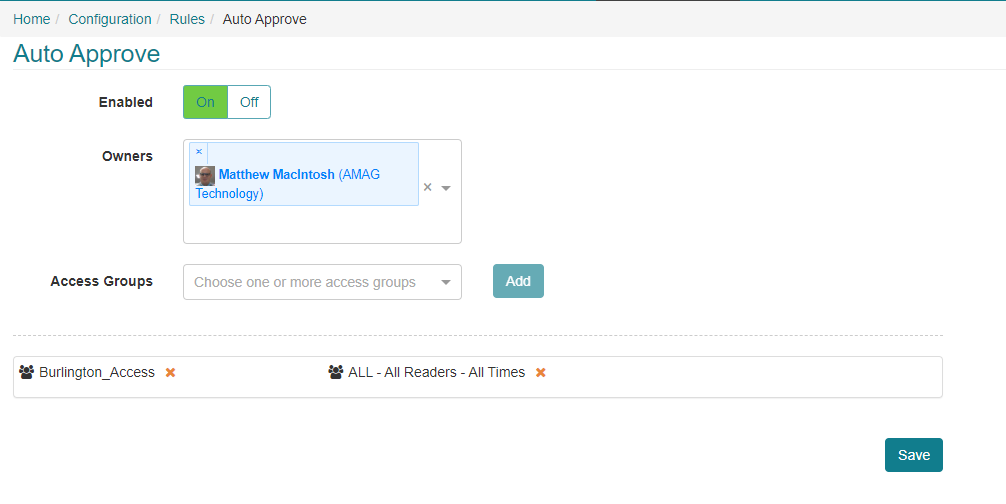
Auto Approve
To setup Auto Approve rules
- Click the CONNECT tab
- In CONNECT, select the Configuration tab
- On the Configuration page, click Rules
- On the Rules page, click Auto Approve
- On the Auto Approve page, click On next to Enabled
- Next, select the identity or identities that will be the owners of the rule
- Next, select the Access Groups that should be auto approved.
- Finally click Save
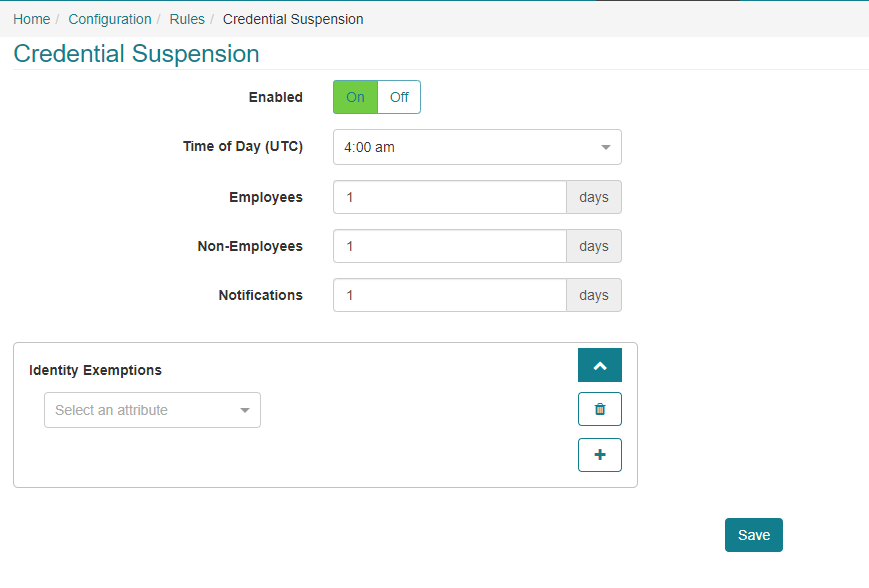
Credential Suspension
To configure the credential suspension rule:
- Click the CONNECT tab
- In CONNECT, select the Configuration tab
- On the Configuration page, click Rules
- On the Rules page, click Credential Suspension
- On the Credential Suspension page, click On next to Enabled
- Enter the following fields:
- Time of Day (UTC): This is the time of day, in UTC, that the credentials will be suspended.
- Employees: The number of consecutive days without use a credential has to go before it is suspended for identities that have the Employee identity type.
- Non-Employees: The number of consecutive days without use a credential has to go before it is suspended for identities that have the Non-Employee identity type.
- Notifications: The number of days before a notification warning is sent out.
- Identity Exemptions: One or more attributes that if contained in the identity record will make the exempt from suspension.
- Multiple attributes can be applied, in a And fashion
- Selectable Attributes include:
- Building
- Companies
- Department
- Employee Types
- Identity Category
- User Defined Fields
- Finally, click the Save button
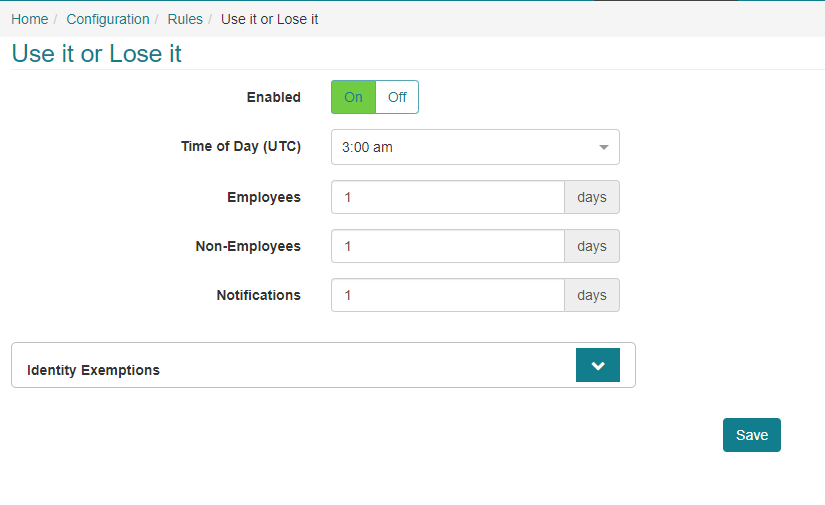
Use it or Lose it
To configure the Use it or Lose it rule:
- Click the CONNECT tab
- In CONNECT, select the Configuration tab
- On the Configuration page, click Rules
- On the Rules page, click Use it or Lose it
- On the Use it or Lose it page, click On next to Enabled
- Enter the following fields:
- Time of Day (UTC): This is the time of day, in UTC, that the access will be removed.
- Employees: The number of consecutive days without use that an access group has to go before it is removed for identities that have the Employee identity type.
- Non-Employees: The number of consecutive days without use that an access group has to go before it is removed for identities that have the Non-Employee identity type.
- Notifications: The number of days before a notification warning is sent out.
- Identity Exemptions: One or more attributes that if contained in the identity record will make the exempt from suspension.
- Multiple attributes can be applied, in a And fashion
- Selectable Attributes include:
- Building
- Companies
- Department
- Employee Types
- Identity Category
- User Defined Fields
- Finally, click the Save button