Scan Utility
Installation Steps:
Before installing the AMAG.ScanUtility, please install the scanner as per manufacturer instructions. The scanner is assigned a com port and the AMAG.ScanUtility requires that the com port be set during the installation.
The E-Seek M260 drivers can be found at: https://idscan.net/support/driversfirmware/. Download the relevant driver exe and install the driver. Once the driver is installed, connect the E-Seek to the workstation.
The AMAG.ScanUtility can be downloaded from Symmetry GUEST. From the Dashboard tab, scroll to the bottom of the page where the download link can be found.
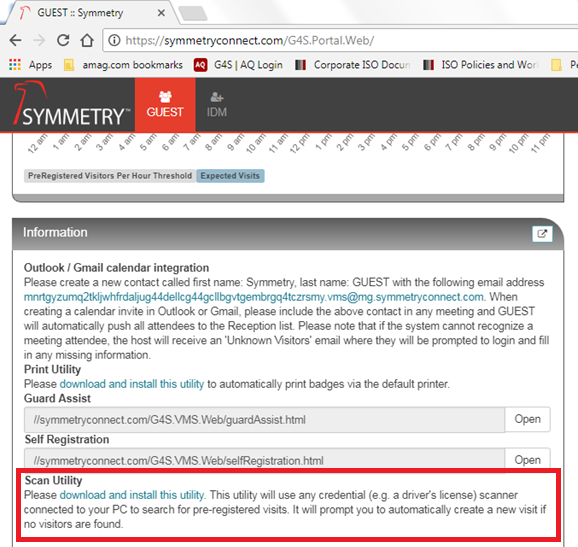
To download, simply click on the “download and install this utility”. This will download the executable to your “downloads” folder.
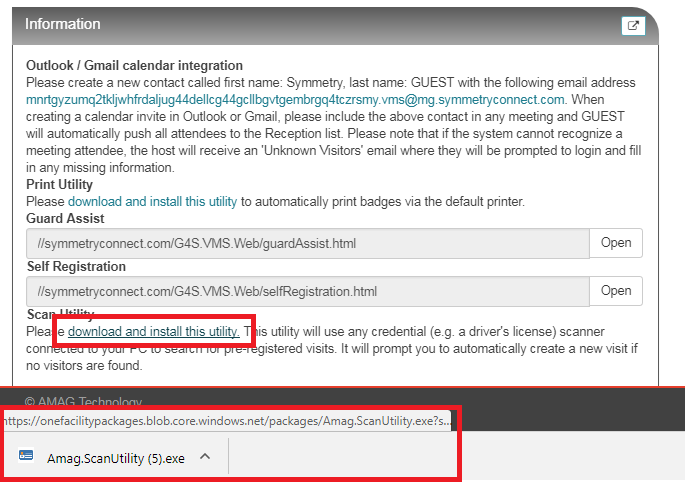
Next, we will navigate to the “Downloads” folder to find the newly downloaded “exe”. Click on the little “down” arrow and then select “Show in Folder”. 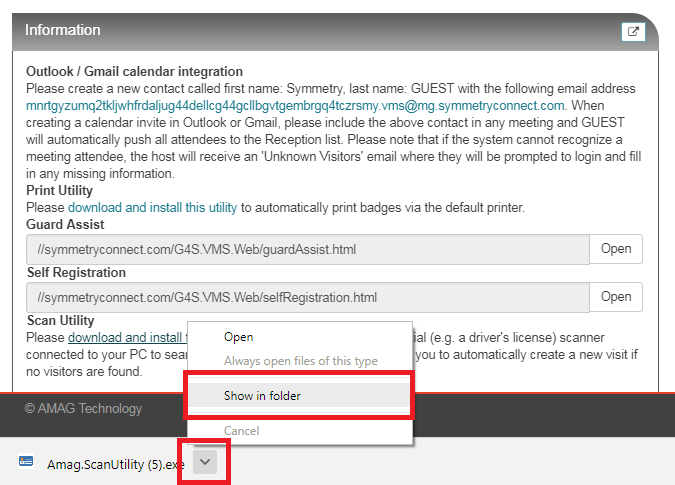
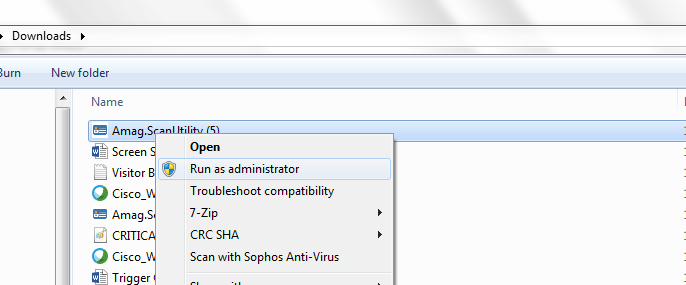
Simply select the file, right-click and select “Run as administrator”. The installation will begin.
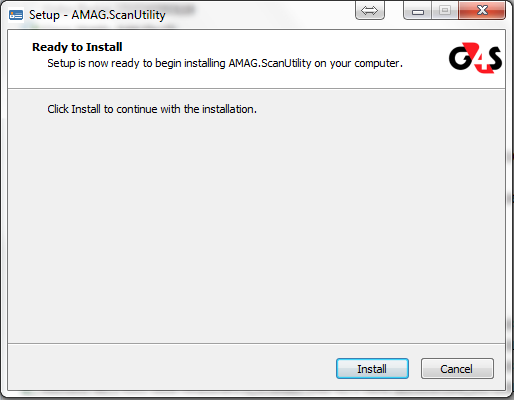
Click on the “Install” button to start the install.
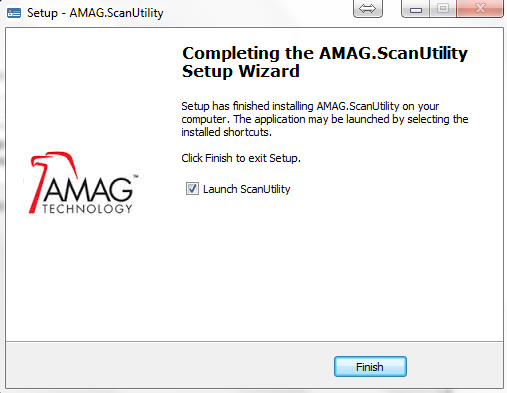
You will see the below screen when the install is complete. Click on “Finish”.
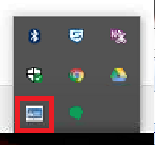
The AMAG.ScanUtility icon should appear in the system tray.
Configuration
The following steps describe the configuration process for the ID Scan utility.
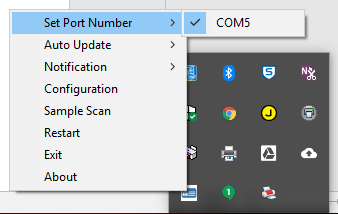
Right-clicking on the icon will show various options.
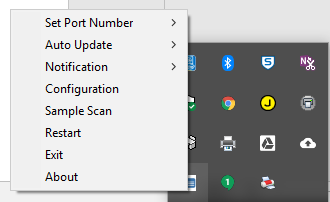
Set Port Number:
The user will need to know the COM port that Windows assigned to the scanner. This is assigned by Windows and can/will be different on every machine depending what other peripherals are already installed. This is important as we will need to match the COM ports in the AMAG.ScanUtility settings (description and instruction later in this document).
To locate the COM port, open Device Manager and expand “Ports”.
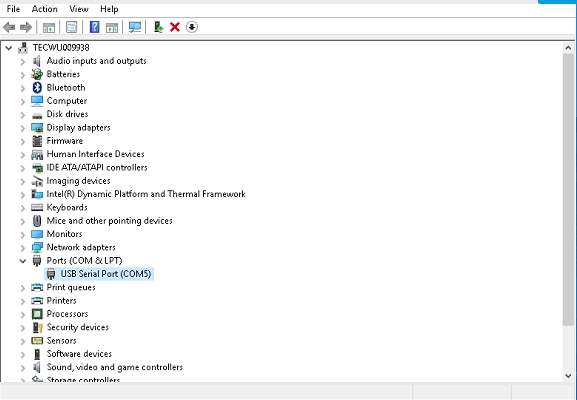
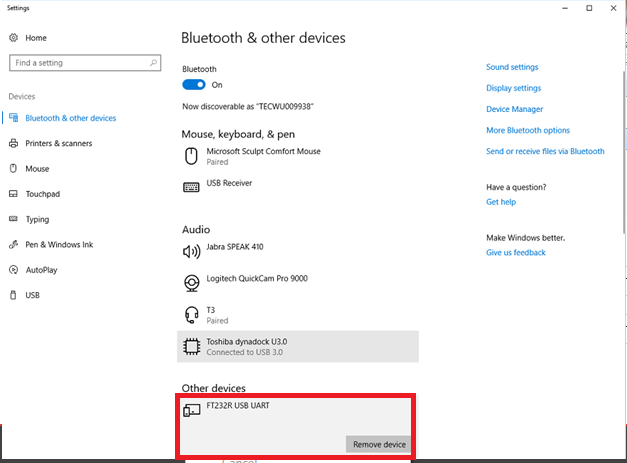
Window 10 Settings may list the E-Seek M260 as “FT232R USB UART” under “Bluetooth and other devices”
Once the AMAG.ScanUtility is installed, complete the setup by setting the COM Port of the scanner. This can be done by going to the system tray and right-click on the ScanUtility Icon > Set Port Number and select the correct scanner port.
Configuration:
Right-click the Scan Utility and select Configuration.
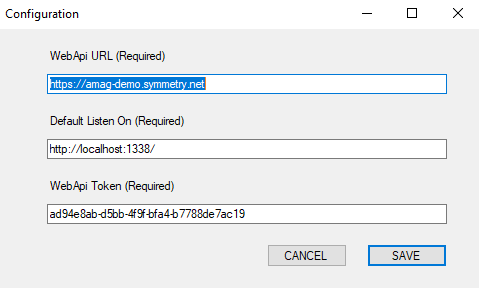
- WebApi URL: Enter the URL of the Symmetry Guest system (https://[*sub-domain].*symmetry.net).
- Default Listen On: Typically this is left as default (localhost:1338). This is the default port that the utility will use.
- WebApi Token: To located the token, a Guest administrator must navigate to Guest Configuration. If Access Control is set to “Off”, it must be set to “On”.
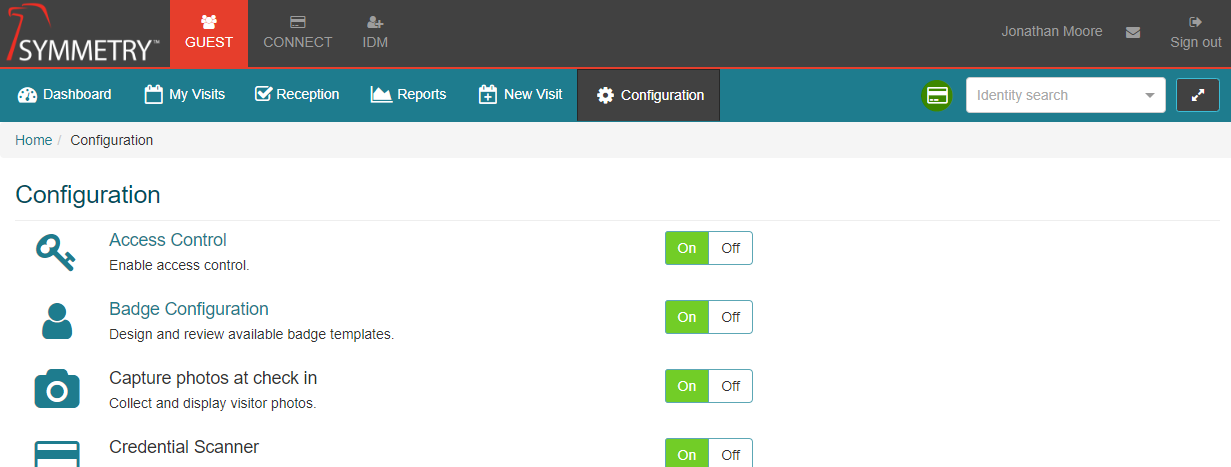
- Select the Access Control Link (see image above).
- Copy the WebApi Token.

- Paste the Web Api Token into the Print Utility.
Click “Save” to save the settings.
Notification:
The user can also enable the scanner notification. This can be done by going to the system tray and right-click on the ScanUtility Icon > Notification and select “On”. The Notification feature allows the user to see what the scanner reads from the card in a system tray notification pop-up message

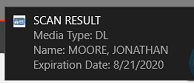
The AMAG.ScanUtility is now installed and configured. To test, simply Log in Symmetry Guest. The AMAG.ScanUtility will show a message that it is “Initializing”. Once “Initialized”, present the barcode of the driver’s license to the scanner and you should see a message in the system tray area like the below:
On the Reception Tab of Guest, the user will see a green icon, indicating the ID Scanner is connect. If the green icon is not displayed, the ID Scanner is not configured correctly.

In Symmetry GUEST, the license scan can be used to quickly lookup pre-registered visits. Scan the ID. If a match is found in from the list of pre-registered visits, the “check-in” window will automatically pop up.

If no pre-registered visits are found, GUEST will prompt the operator if he wants to create a new visit with the data captured from the driver’s license scan.

Troubleshooting:
- Make sure the E-Seek Scanner is set up correctly in Device Manager and has been set up with a COM Port Number.
- Make sure the COM Port Number in Device Manager matches the Port in the ID Scan Utility.
- Make sure there the Green Icon appears on the Reception Tab of Guest, indicating that the Scanner is connected.
- If the scanner is still not working, make sure that Windows Firewall or any Virus Scan Applications (e.g. Symantec) are not blocking the port or the ID Scan Application. The application can be added as an exception to the Virus Scan Application. Customer IT may need to assist with this process.