Screen Configuration
GUEST > Configuration > Screen Configuration:
Screen configuration allows an administrator to configure which fields are hidden/visible/required during visit registration and check-in on the GUEST tab. User Defined Fields (UDF’s) can also be added to the screens on this page.
User Defined Fields must be created before they can be assigned on the Screen Configuration page. Please review the User Defined Fields section of this guide for more details.
It is important to note that screen configuration is dependent upon the specific Visitor Type and Building configured for each visit. For example, the fields that are visible/required when registering a visit for “Building 1” and Visitor Type “Contractor”, can be very different to a visit in “Building 2” for Visitor Type “Job Interview”. Each combination can have its own set of required fields as different information may be required.
- To edit the default screen configuration, navigate to GUEST Configuration Screen Configuration. Edit the existing configuration (for all Buildings/Visitor Types).
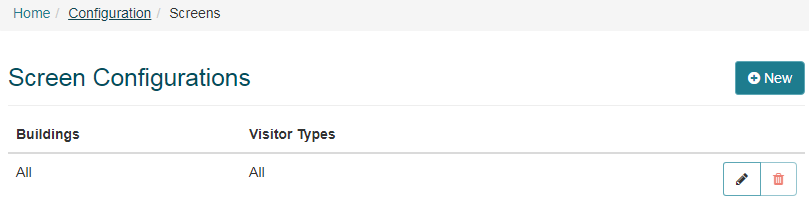
- It is not possible to edit the Building/Visitor Type settings for the default screen configuration screen, however a new screen configuration can be created for specific Buildings and Visitor Types by clicking “New” on the previous page.
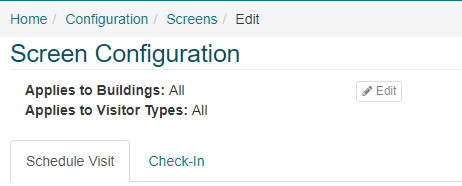
- Make changes to the fields for the “Schedule Visit” screen and the “Check-in” screen from this page. Note: User Defined Fields can be added to each screen as required.
Schedule Visit
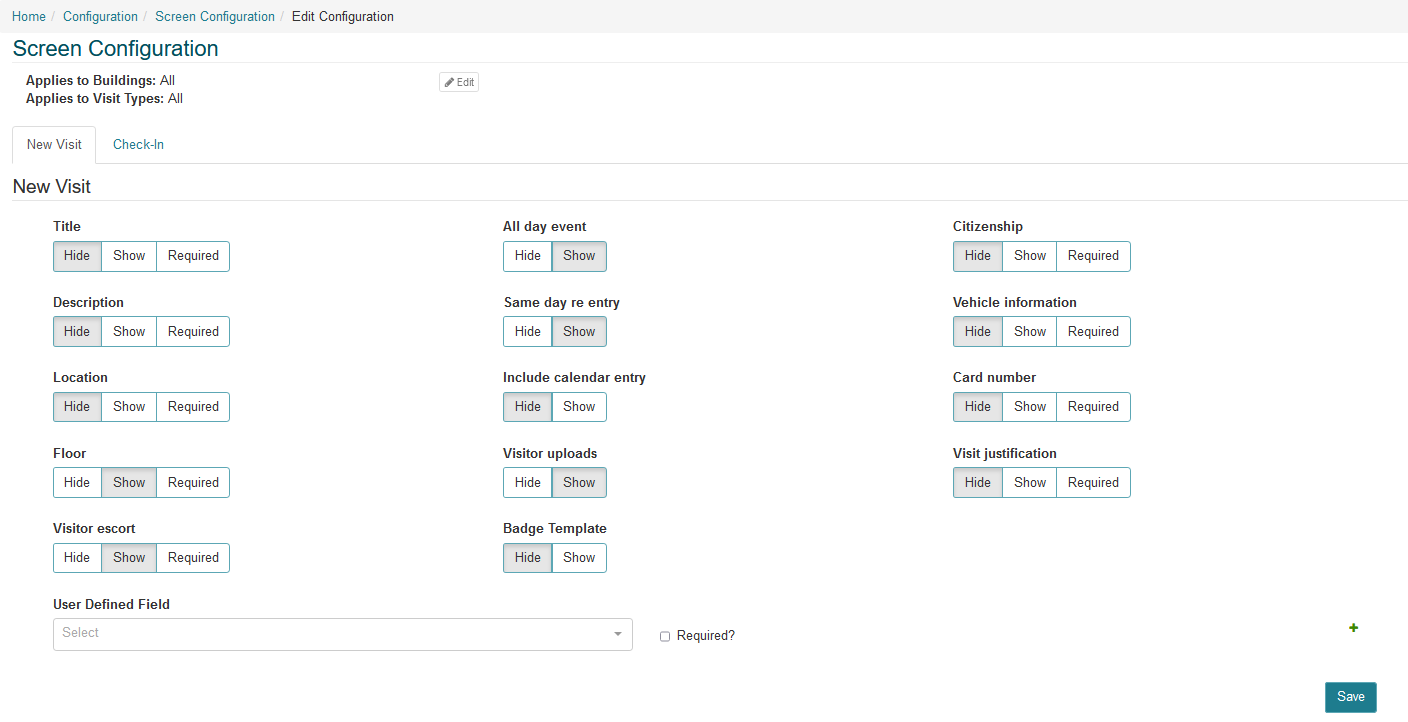
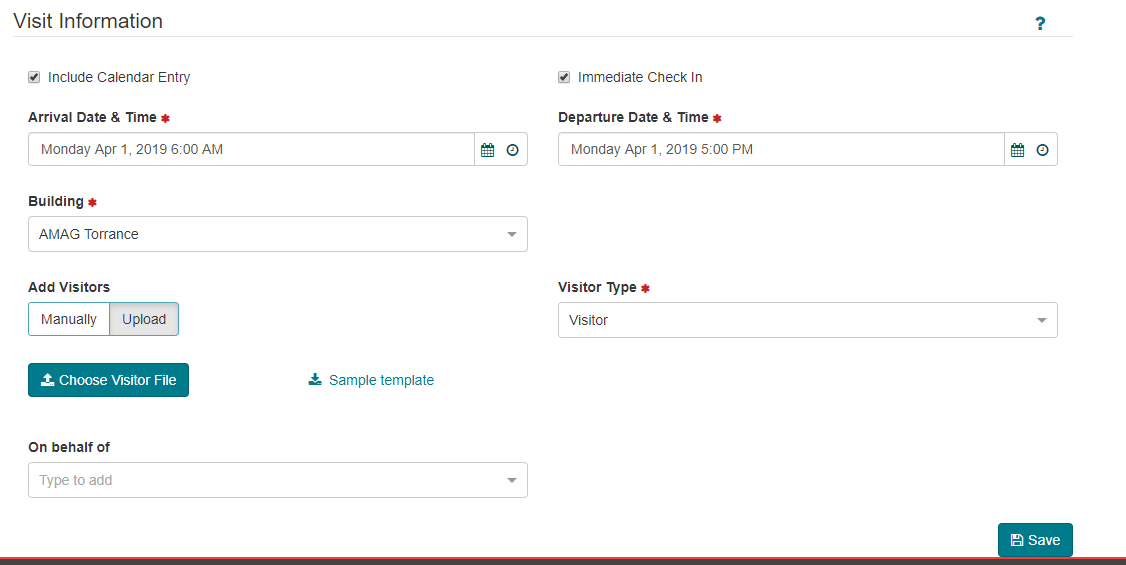
The Schedule Visit tab focuses on the registration of a visitor. It allows you to configure the following fields:
- Title
- Description
- Location
- Floor
- Visitor escort
- All Day Event
- Same Day Re Entry
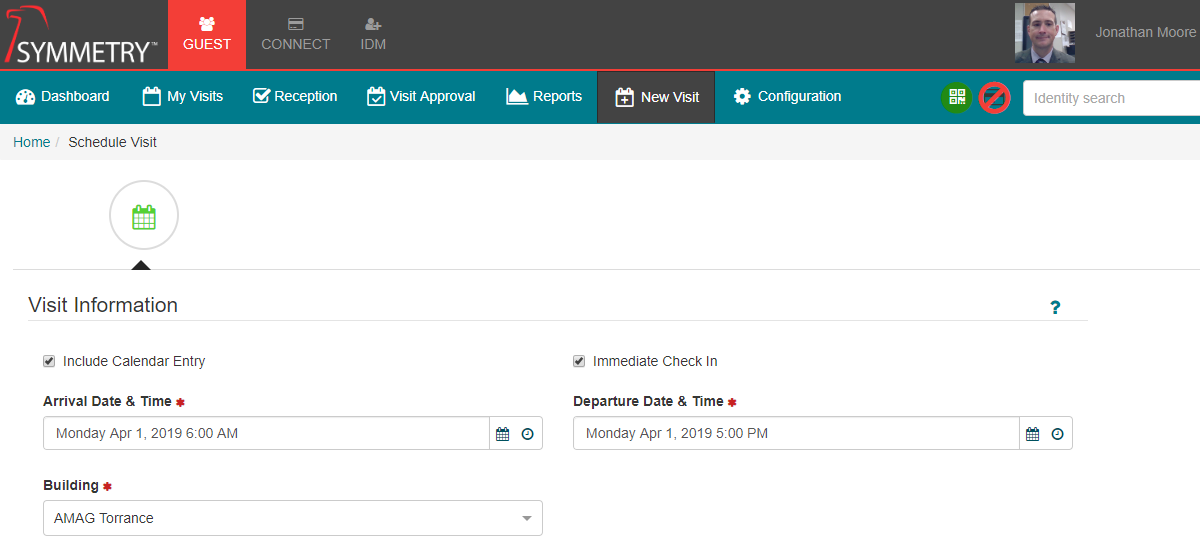
- Include Calendar Entry: This allows for an ICS calendar invitation to be attached to the visitor welcome email. If this field is set to “Show”, a checkbox is available on the “New Visit” page, allowing the Host user to attach a calendar invitation to the visitor welcome email.
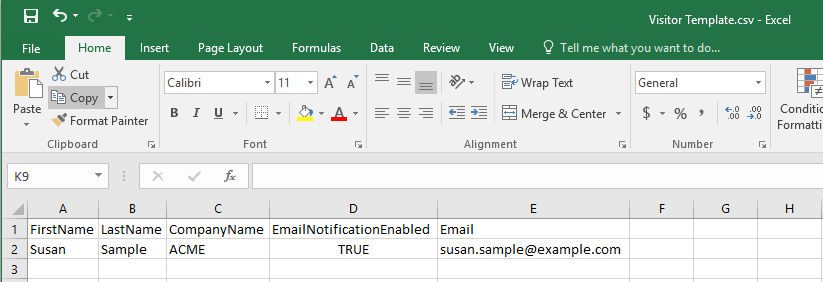
- Visitor Uploads: If set to “Show”, a Host user is able to upload a group of visitors from a spreadsheet during the registration process. This is very useful for registering a large group of visitors for a specific event. When registering a visitor, select “Upload” (instead of “Manually”). Simply download the sample template, enter your visitors and click “Choose Visitor File” to upload the visitors.
- Citizenship
- Vehicle Information: If set to “Show” or “Required” will prompt a user to enter the Vehicle Make, Vehicle Model, and Vehicle Plate Number of the visitors vehicle.
- Card number
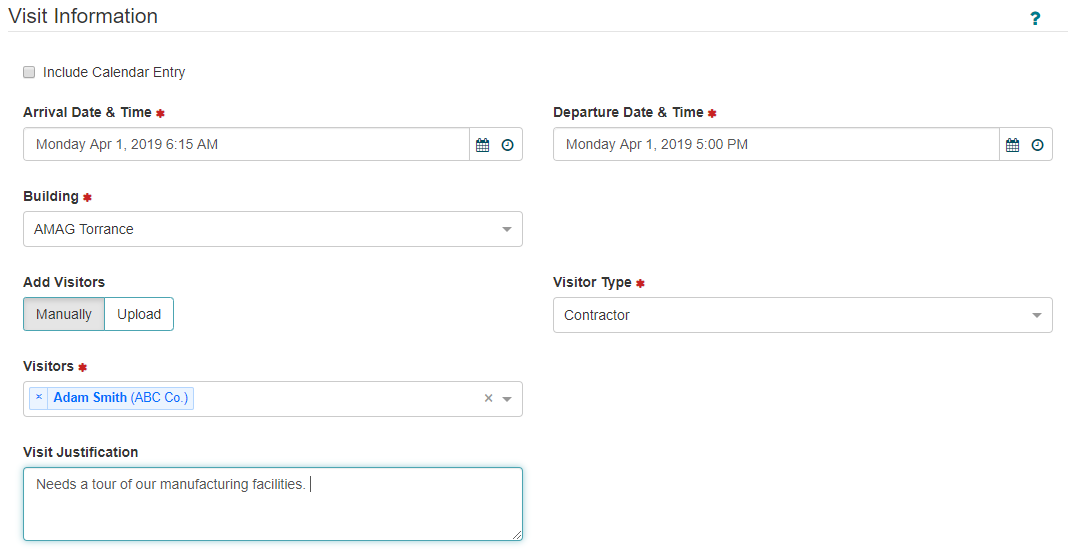
- Visit Justification: The Visit Justification field can be added to provide a reason, or justification for specific visits. This field is useful when used in conjunction with the Visit Approval functionality, as a Host can provide a justification for a specific visit that is visible to the relevant approver. See more details in the Visit Approval section of this guide.

The value entered into Visitor escort will update in the Visitor Escort in the Symmetry Access Control system when visitors are sent to sync as visitor records in Symmetry.
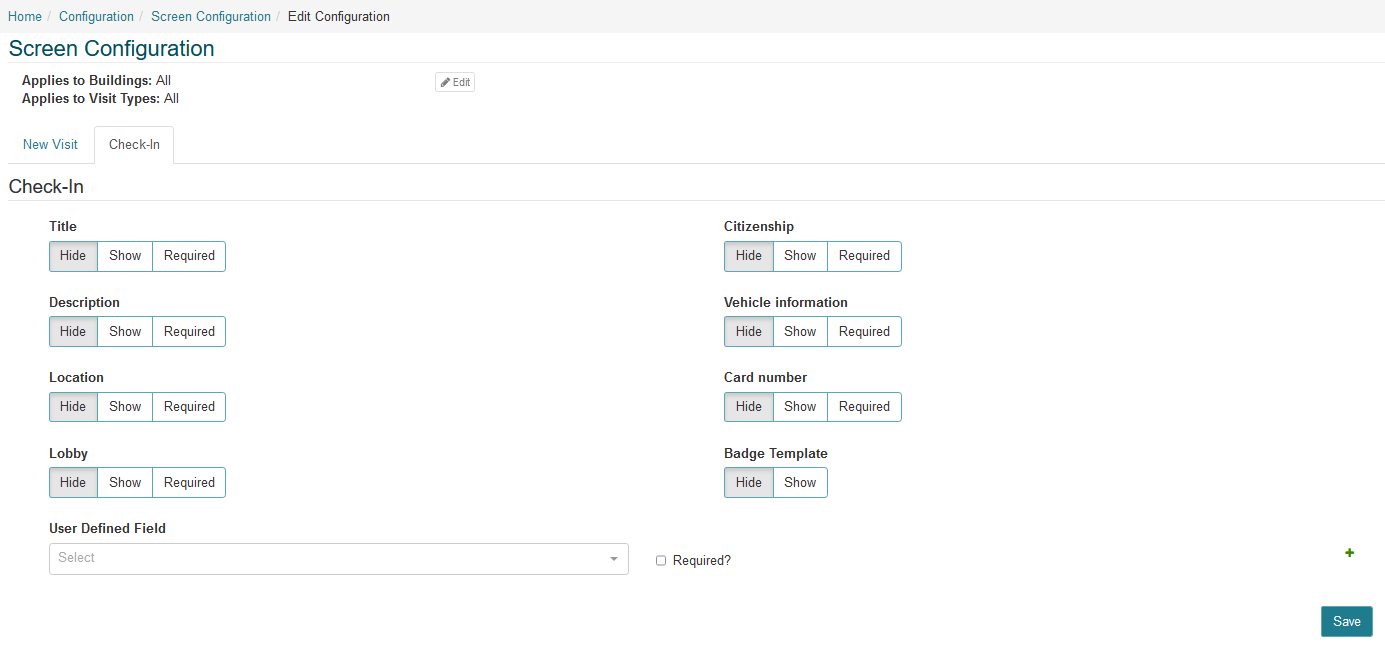
Check-In
 The Check-In tab focuses on the registration of a visitor. It allows you to configure the following fields:
- Title
- Description
- Location
- Lobby
- Citizenship
- Vehicle Information: If set to “Show” or “Required” will prompt a user to enter the Vehicle Make, Vehicle Model, and Vehicle Plate Number of the visitors vehicle.
- Card Number
- Badge Template
If a field is displayed in both the Schedule and Check-In pages, an information entered during registration will carry over into check-in. The receptionist will then have the ability to update it at the time of check-in.