Lobbies
GUEST > Configuration > Lobbies:
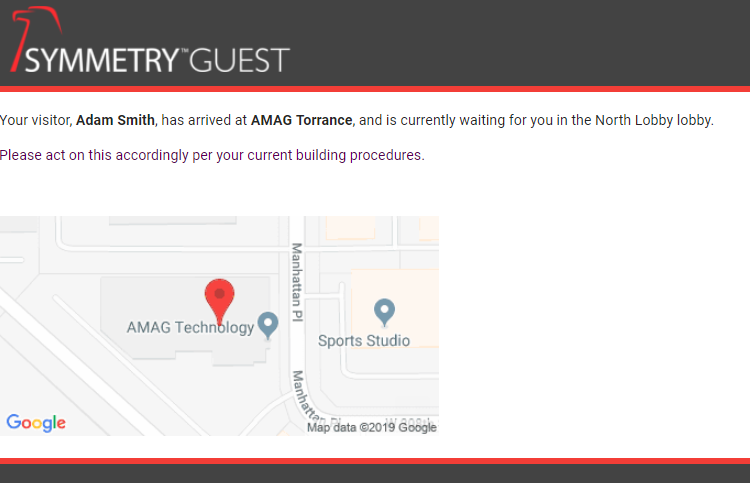
By default, the GUEST application checks visitors in and out of “Buildings”. When a visitor checks into “Building 1” (for example), the Host may receive an email notifying them of their visitor’s arrival.
The default check-in functionality works for the majority of users, however certain Buildings may have multiple lobbies through which the visitor can enter/exit, creating confusion about where the Host should meet their visitor. For these types of situations, it is recommended to use the “Lobbies” functionality to create separate Lobbies within a Building.
If (for example) a user creates a “North Lobby” and “South Lobby” for a Building, when the visitor checks-in, the Host Notification will let the Host know which Lobby to meet their visitor.
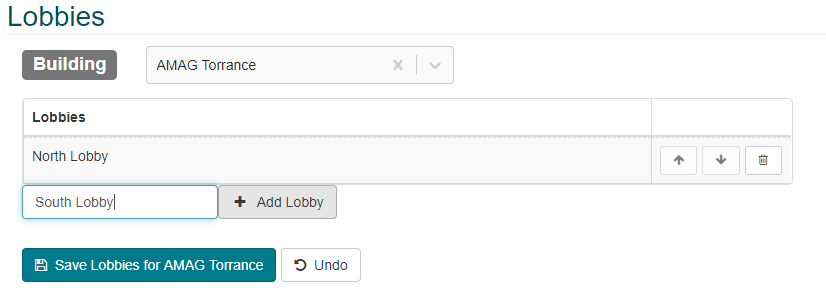
- To create a Lobby, select a Building on the Lobbies page (GUEST Configuration Lobbies).

- Enter the name of the Lobby and click “Add Lobby”. Once complete, save the Lobbies.
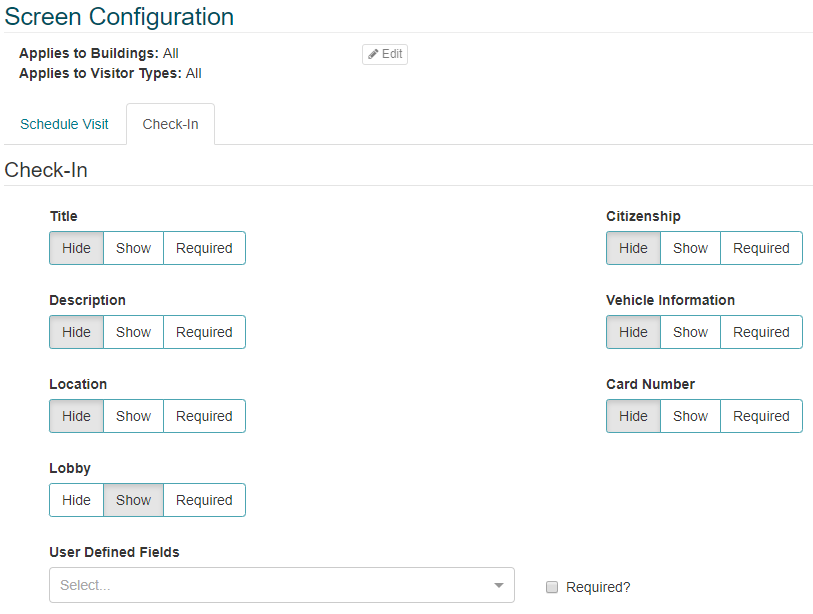
- The “Lobby” field must be visible on the check-in screen. Set the “Lobby” field to “Show”, or “Required” (GUEST Configuration Screen Configuration Check-in). For more information please review the Screen Configuration section of this guide.
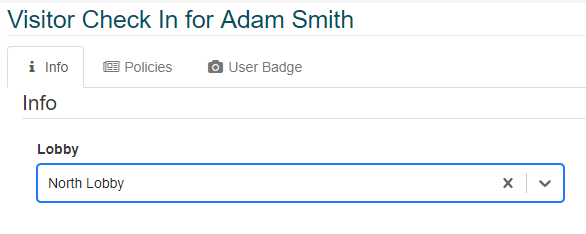
- During the check-in process for a visitor to the Building in question, the Reception User will specify the specific lobby.
- When the visitor is checked-in the Host will typically receive an email notification with the relevant lobby information included.