Visit Type Configuration
GUEST -> Configuration -> Visit Type Configuration:
The Visit Configuration page allows for the configuration of visit types, visit type behaviors, as well as what visit types will be display for each building and company.
Visit Configuration
The Visit Configuration page displays the defined visit configurations. The list displays:
- Buildings: The building that the configuration will apply to
- Companies: The companies that the configuration will apply to
- Configured Visit Types: The visit types that will be available for this configuration
From this list you have the following options:
- Edit: Allows you the edit the configuration including: Buildings, Companies, Visit Types included and their order.
- Delete: Will remove the configuration from the list.

Adding New Visit Configurations
A new visit type configuration is added by clicking the Add new Visit Configuration button.

When adding a new configuration the first step is to select the building and companies that this configuration will apply to.

For both buildings and companies you have the following options:
- All: Will apply to all buildings or companies
- Specific: You can select one or multiple buildings or companies
Only one configuration will be allow for building and company combination. For example you cannot have to configurations that cover All buildings and All companies.
Once the building and companies are selected, the next step is to define the visit types that will be included in this configuration.
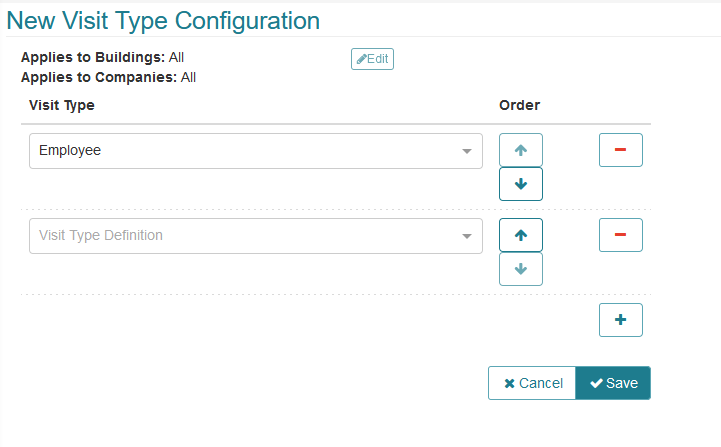
In this section you can:
- Add: Add a new visit type by clicking the plus sign icon and selecting the Visit Type from the Visit Type Definition dropdown
- Remove: A visit type can be removed from the list by clicking the minus sign icon.
- Reorder: The order in which the visit types will be displayed can be adjusted by using the up and down arrow icons.
The order of visit type is important for two reasons: 1) The first visit type will be the default used when registering a new visit. 2) The first visit type will be used as the visit type of visits registered via a self-registration kiosk
Adding and Managing Visit Types
Visit types can be managed by the clicking the Add/Manage Vist Types button.

From the Visit Type Definitions page you can:
- Add: Add a new visit type
- Edit: Edit the visit type
- Delete: Delete a visit type
Each Visit Type has the following configurations:
- Name: The name that will be displayed for the visit type
- Color: The color that will be used as the background the that visit type
- Visit Settings: Various settings for the visit including registration and visit length settings, photo settings, check-in and check-out settings
- Visit Notifications: Various settings around the notification that can be sent out for each visit type.
Visit Settings
Registration and Visit Length
This section allows you to configure:
- Maximum advance pre-registered: This defines, in days, how far in advance a visit of this type can be registered.
- Maximum visit length: This defines, in days, how long a visit of this type can be scheduled for.

Photo
This section allows you to configure:
- Photo expiration: This defines, in days, how long a visitor of this type photo will be valid for until a new one needs to be taken.
- Use Existing Photo: The existing photo for returning visitors is used, rather than requiring a new photo each time the visitor is checked-in. This setting can be used in conjunction with “Photo Expiration” above.
- Require Visitor Photo: If checked, a photo is required and the visitor cannot check-in unless a photo is assigned to their record.
- Show Expired Photo Indicator: If checked, all expired photos will appear as expired (in black and white instead of color) on the visitor’s record.

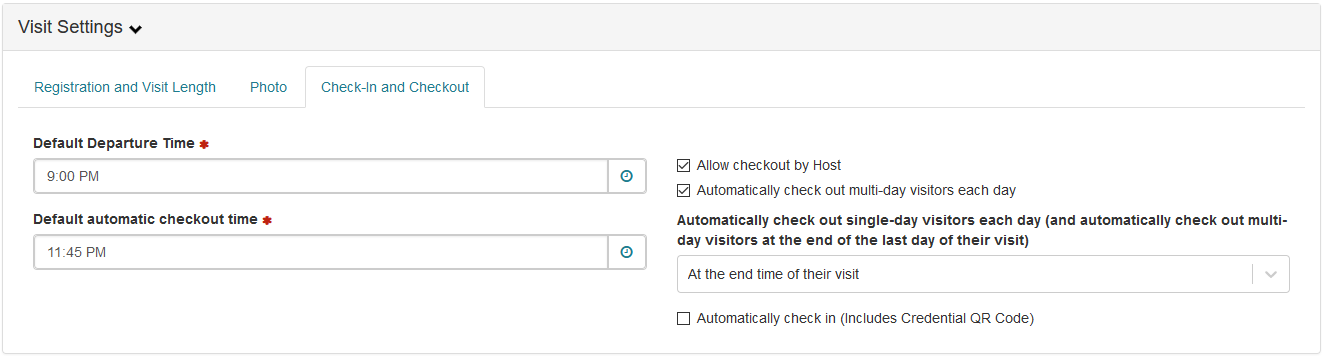
Check-In and Checkout
This section allows you to configure:
- Default Departure Time: This is the departure time that will be set for all visits. The Host can manually change the departure time when creating their visit.
- Default automatic checkout Time: This setting determines the time at which the system will automatically check-out visitors that are still checked in each day.
- Allow checkout by Host: If checked, Host users are able to check-out their own visitors at the end of the visit. The Host can check-out their visitors on the My Visits page.
- Automatically check out multi-day visitors each day: If checked, any visitors that were registered for more than 1 day will be automatically checked-out by the system each day (at the Default automatic check out time).
- Automatically check out single-day visitors each day (and automatically check out multi-day visitors at the end of the last day of their visit): This allows you to select:
- No auto checkout: No auto-checkout will occur
- At default automatic checkout time: Any single-day visitors are checked-out automatically by the system each day at the Default automatic check out time.
- At the end of their visit: Any single-day visitors are checked-out automatically by the system each day at their departure date/time.
- Automatically check in (Includes Credential QR Code): If checked, visits of this visit type will be automatically checked-in at there scheduled arrival time it will also automatically include a QR Code in the visitor welcome email that can be used as there credential.
Visit Notification
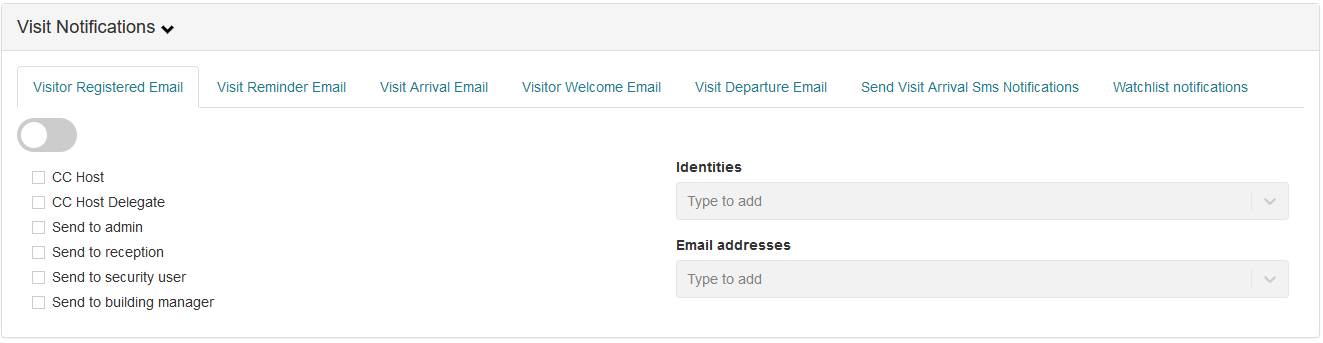
Visitor Registered Email
This section allows you to configure:
- Enable/Disable: Configure if this email should be sent when a visit is registered
- CC Host: If checked, this email will be sent to the host
- CC Host Delegate: If checked, visitor registration emails will be sent to the host delegate
- Send to admin: If checked, this email will be sent to identities hold the GUEST administrator role
- Send to reception: If checked, this email will be sent to identities hold the GUEST receptionist role
- Send to security user: If checked, this email will be sent to identities hold the IDM Security Manager role
- Send to building manager: If checked, this email will be sent to identities hold the IDM Building Manager role
- Identities: Allows for a list of identities that this email will be sent to.
- Email addresses: Allows for a list of email address that this email will be sent to.
Visit Reminder Email
This section allows you to configure:
- Enable/Disable: Configure if the Visit Reminder Email will be sent.
- Visit reminders days in advance: Allows you to set, in days, how many days in advance of the visit a reminder email should be sent to the visitor.

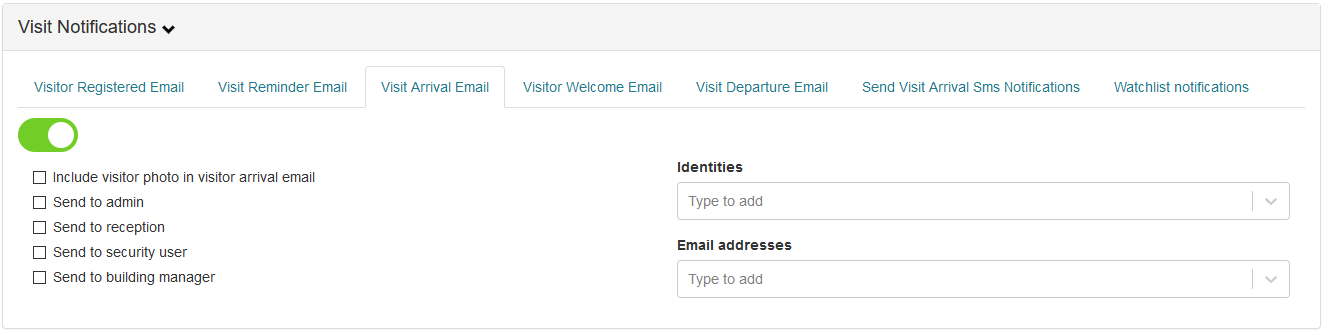
Visit Arrival Email
This section allows you to configure:
- Enable/Disable: Configure if the Visit Arrival Email will be sent.
- Include visitor photo in visitor arrival email: If checked the email will include the visitors photo
- Send to admin: If checked, this email will be sent to identities hold the GUEST administrator role
- Send to reception: If checked, this email will be sent to identities hold the GUEST receptionist role
- Send to security user: If checked, this email will be sent to identities hold the IDM Security Manager role
- Send to building manager: If checked, this email will be sent to identities hold the IDM Building Manager role
- Identities: Allows for a list of identities that this email will be sent to.
- Email addresses: Allows for a list of email address that this email will be sent to.
We recommend enabling this email if Auto Check-In is enabled for the visit type to notify key personal that the visit has been checked in
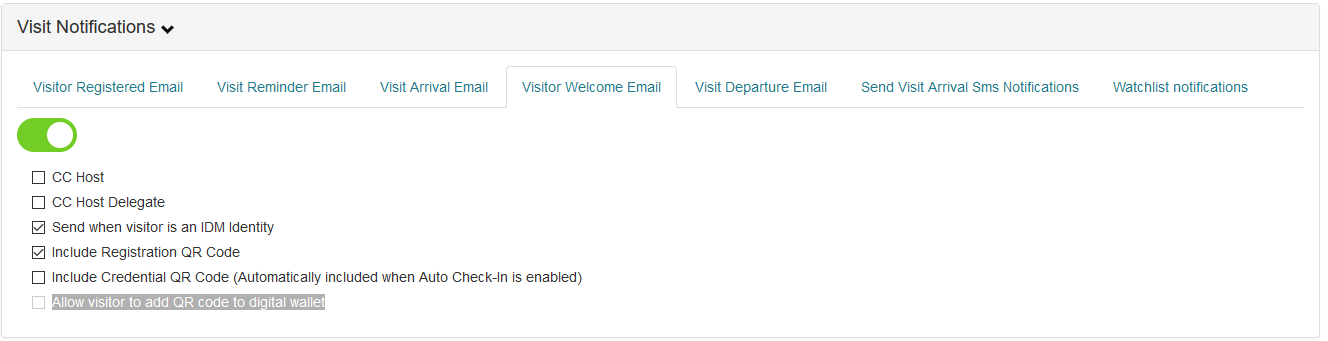
Visitor Welcome Email
This section allows you to configure:
- Enable/Disable: Configure if this email should be sent
- CC Host: If checked, this email will be sent to the host
- CC Host Delegate: If checked, this email will be sent to the host delegate
- Send when visitor is an IDM Identity Type Employee/NonEmployee: If checked, employees who are registered as a visitor will also receive the Visitor Welcome Email. An active employee can be registered as a visitor for another location; this checkbox determines whether they receive the same welcome email as a visitor when they are registered.
- Include Registration QR Code: If checked, the Visitor Welcome Email will include a QR Code (barcode) that can be used to locate the visitor record during check-in at the reception desk, or kiosk.
- Include Credential QR Code (Automatically included when Auto Check-In is enabled): If checked, a credential in the form of a QR Code will be included in the Visitor Welcome email. This credential will be able to be used after the visit has been checked-in.
- Allow visitor to add QR code to digital wallet: If checked, the visitor welcome email will include links to be able to add the credential to the visitors Google or Apple wallet application. This is only selectable if Include Credential QR Code is selected.
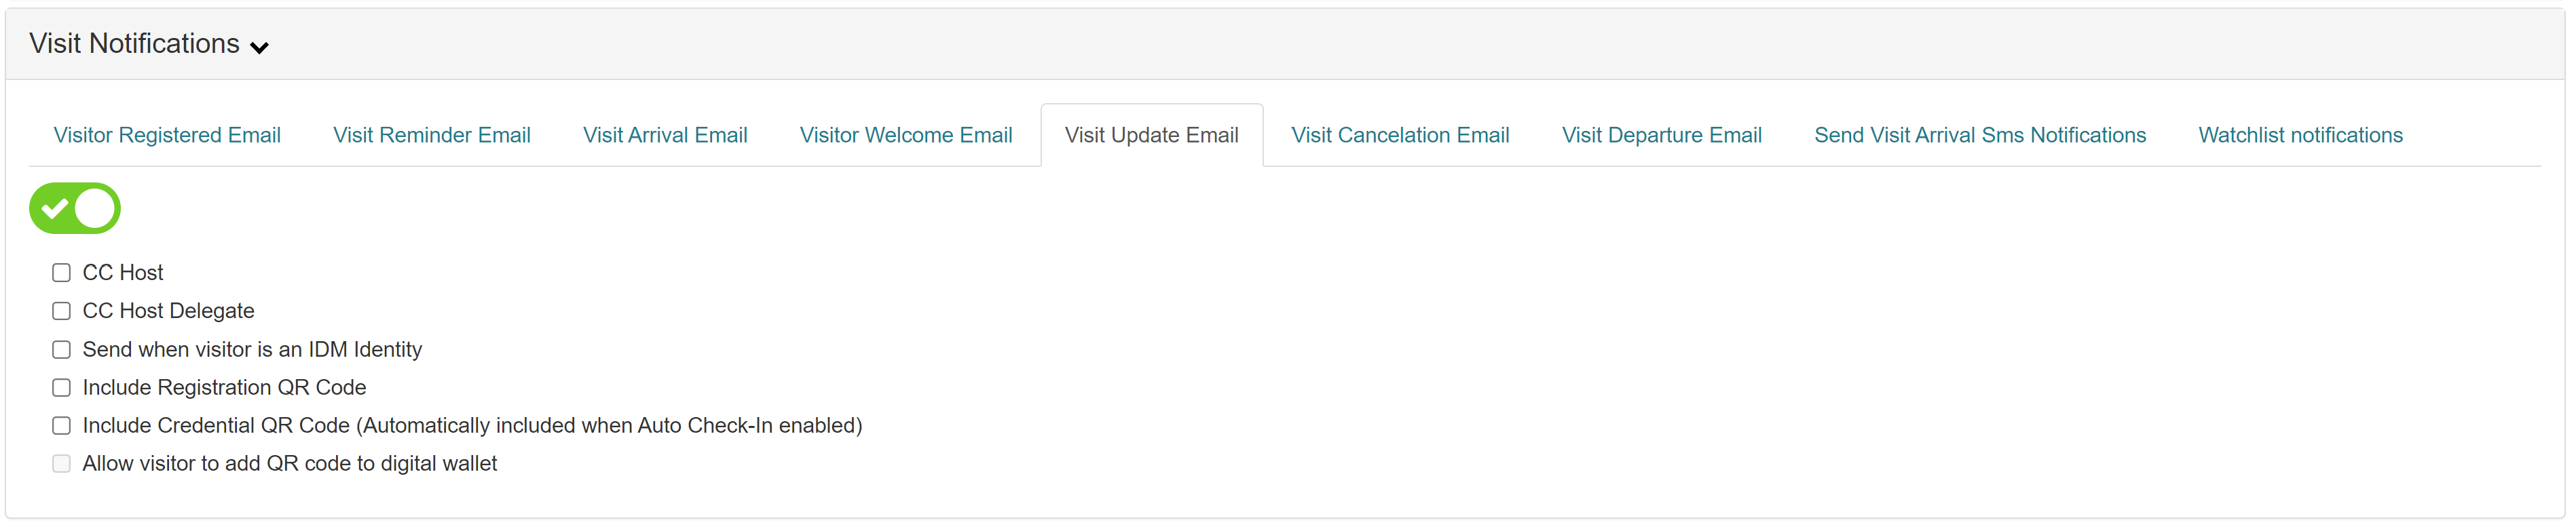
Visit Update Email
This section allows you to configure:
- Enable/Disable: Configure if this email should be sent
- CC Host: If checked, this email will be sent to the host
- CC Host Delegate: If checked, this email will be sent to the host delegate
- Send when visitor is an IDM Identity Type Employee/NonEmployee: If checked, employees who are registered as a visitor will also receive the Visitor Welcome Email. An active employee can be registered as a visitor for another location; this checkbox determines whether they receive the same welcome email as a visitor when they are registered.
- Include Registration QR Code: If checked, the Visitor Welcome Email will include a QR Code (barcode) that can be used to locate the visitor record during check-in at the reception desk, or kiosk.
- Include Credential QR Code (Automatically included when Auto Check-In is enabled): If checked, a credential in the form of a QR Code will be included in the Visitor Welcome email. This credential will be able to be used after the visit has been checked-in.
- Allow visitor to add QR code to digital wallet: If checked, the visitor welcome email will include links to be able to add the credential to the visitors Google or Apple wallet application. This is only selectable if Include Credential QR Code is selected.
Visit Cancelation Email
This section allows you to configure:
- Enable/Disable: Configure if this email should be sent when a visit is registered
- CC Host: If checked, this email will be sent to the host
- CC Host Delegate: If checked, visitor registration emails will be sent to the host delegate
- Send when visitor is an IDM Identity Type Employee/NonEmployee When checked the email will be sent to a visitor that is an employee or nonemployee identity

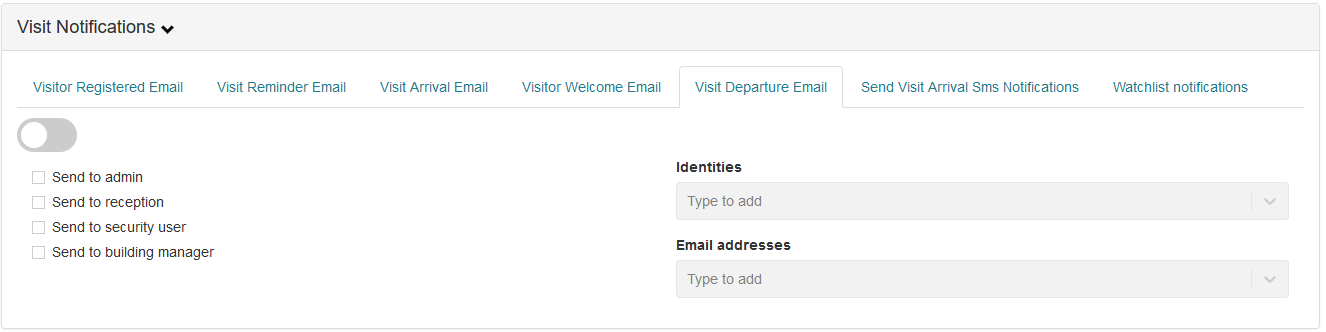
Visit Departure Email
This section allows you to configure:
- Enable/Disable: Configure if this email should be sent
- Send to admin: If checked, this email will be sent to identities hold the GUEST administrator role
- Send to reception: If checked, this email will be sent to identities hold the GUEST receptionist role
- Send to security user: If checked, this email will be sent to identities hold the IDM Security Manager role
- Send to building manager: If checked, this email will be sent to identities hold the IDM Building Manager role
- Identities: Allows for a list of identities that this email will be sent to.
- Email addresses: Allows for a list of email address that this email will be sent to.
Send Visit Arrival SMS Notification
This section allows you to configure:
- Send visit arrival SMS (TEXT) notification (must have valid Mobile phone configured in IDM): If checked, a notification via SMS (short message service) will be sent to the host.

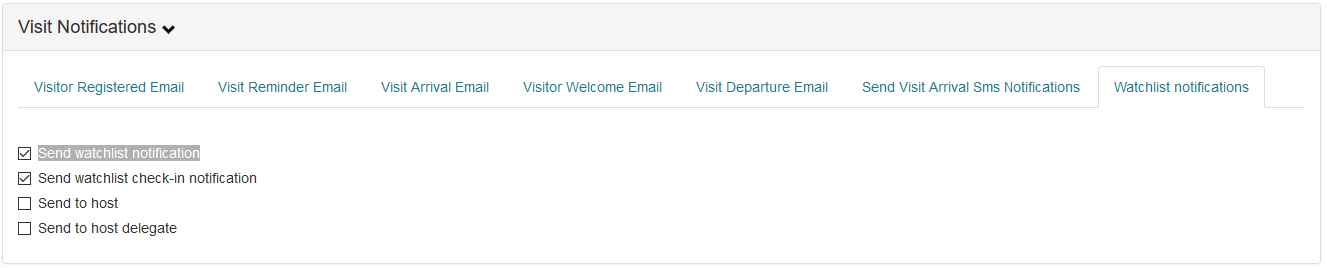
Watchlist Notification
This section allows you to configure:
- Send watchlist notification: If checked, users with the Security Manager user role (IDM user role) to receive an email notification when a visitor matching an identity on the watchlist is registered.
- Send watchlist check-in notification: If checked, users with the Security Manager user role (IDM user role) to receive an email notification when a visitor matching an identity on the watchlist is checked-in.
- Send to host: If checked, email notifications will be sent to visits host
- Send to host delegate: If checked, email notifications will be sent to visits host delegate