Visitor Registration
Pre-registration of visitors, for general visits, corporate events and tours allows an organization to better predict how many visitors they will have on a given day and streamlines the check-in process, improving the experience of the visitors and the users of the system. For these reasons AMAG Technology highly recommends pre-registering as many visitors as possible ahead of their visit, and Symmetry GUEST has been designed to make registering a visitor as easy as possible.
Visitors can be registered via three different methods using GUEST:
- Via the GUEST Web-Portal from a local workstation/laptop.
- Via the GUEST Web-Portal from a mobile device/tablet.
- Directly from a calendar application such as Outlook or Google Calendar.
Visitor Registration via the GUEST Web-Portal:
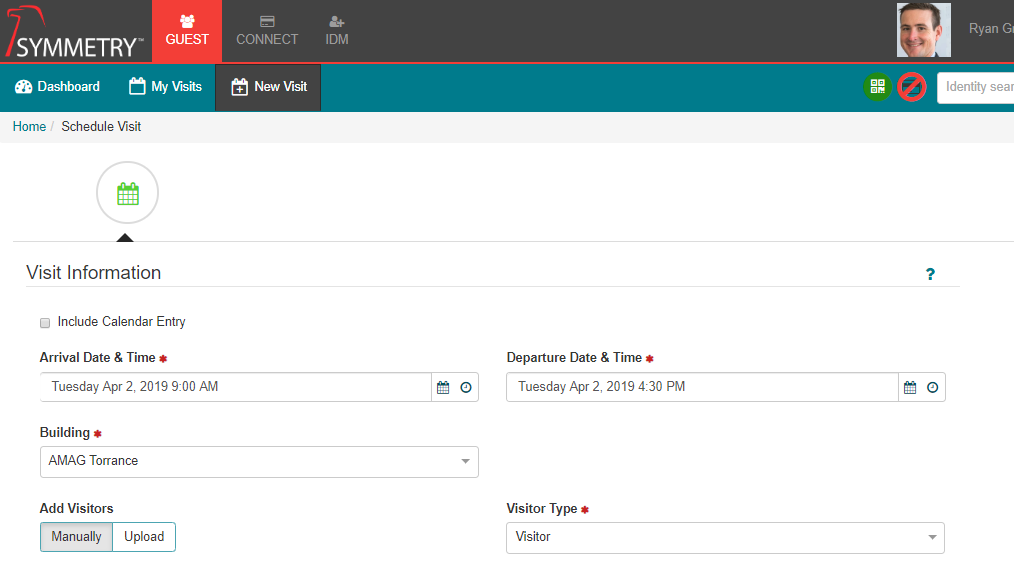
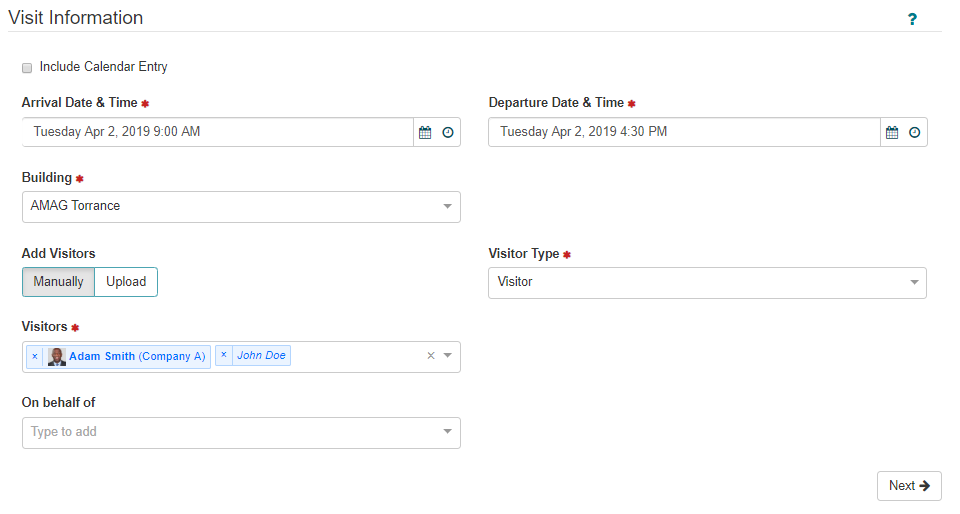
GUEST New Visit:
The fields and steps described below describe the typical process for adding a visitor. Each system may look slightly different depending on the screen configuration and specific role of the user.
-
Log into GUEST
-
Navigate to GUEST New Visit.
-
If required, check “Include Calendar Entry”. This will attach a calendar invitation (.ics calendar file) to the registration email sent to the visitor.
-
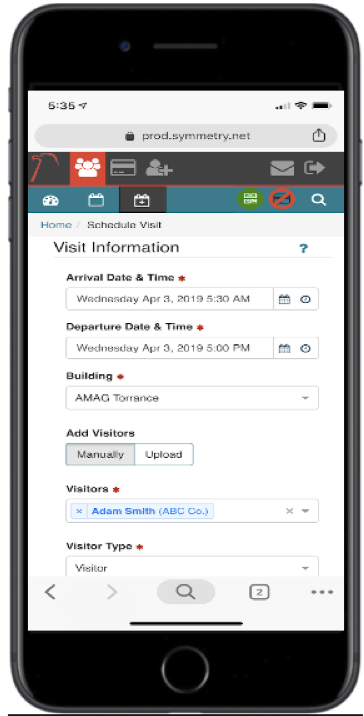
Enter the Arrival and Departure Date and Time for the visit.
-
Select the Building (location where the visitor will be checked-in).
The Buildings available in the drop down will depend on the Buildings assigned to the user. If only a single Building is assigned, then the user will only be able to select a single Building.
- Select the Visitor Type for this visit.
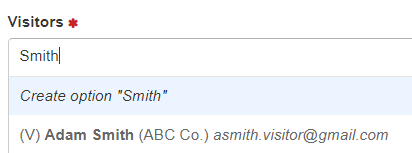
This section covers how to search/add visitors manually to a visit. See Add Visitors via Spreadsheet Upload for instructions on uploading a list of visitors for a specific visit.
-
To manually Add Visitors to this visit, simply start typing in the “Visitors” field. Any existing visitors that match will appear automatically and can be added to the visit.
-
If a new visitor needs to be created, simply click “Create Option” in order to create a new visitor.
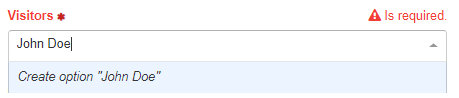
If a new visitor is created, the user will need to enter some additional information about the visitor on the next page. This step is only required when adding a new visitor.
- Specific users with the appropriate user role will have the ability to register visits “On behalf of” other active users in the system. To register this visit on behalf of another user, search for the user and add them to the visit. Please Note: If the user cannot be found in the list, you may not have access to their data.
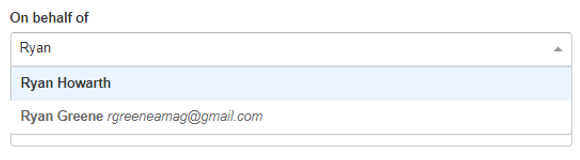
Host Delegation functions in different ways, depending on configuration. For more detail please refer to the Visit Delegation section of this guide.
-
Click “Next” to proceed to the next page. This step is only required because a new visitor was added and some additional data is required. Visit Registration is typically complete at this stage if only existing visitors were selected for the visit.
-
Enter the required information for the new visitor(s) on this page and click “Save”. Visit Registration is complete.
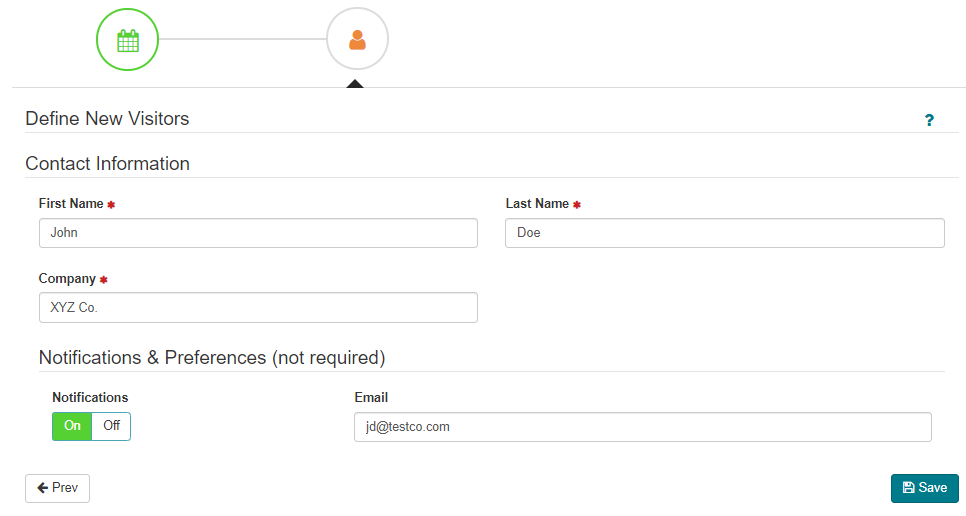
Be sure to turn Notifications “On” if you want the visitor to receive email notifications.
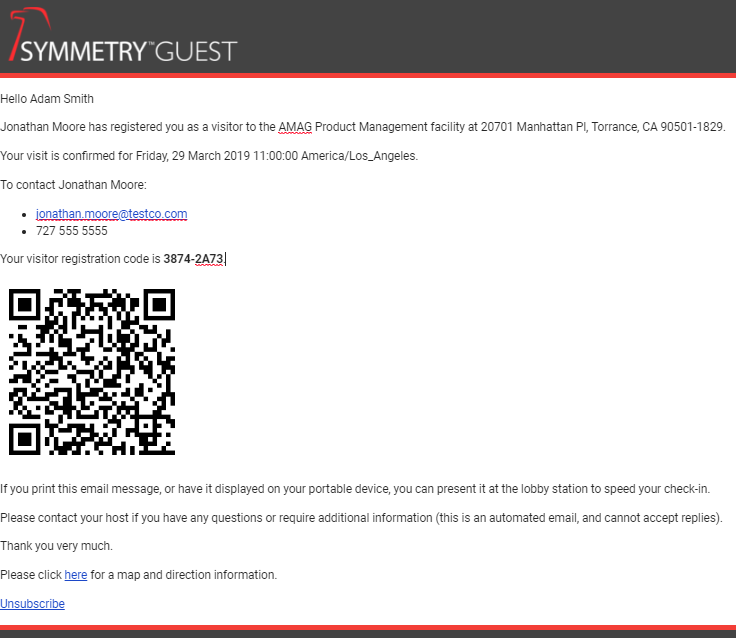
Visitor Registration Email:
- Once the visitors have been registered, they are automatically checked against the internal Watchlist. If the visitors are cleared against the Watchlist they will typically be sent the Visitor Welcome Email notifying them of their upcoming visit.
Visit Reminder Email:
- Depending on configuration, reminder emails are typically sent out to the visitor one day in advance of their upcoming visit.

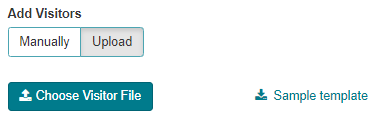
Add Visitors via Spreadsheet Upload:
If enabled, a user is able to upload a group of visitors from a spreadsheet during the visitor registration process. This is very useful for registering a large group of visitors for a specific event.
-
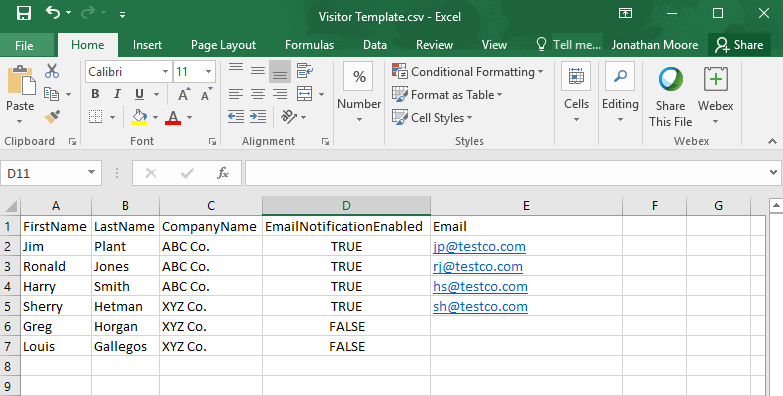
During visitor registration, click “Upload”, then click the “Sample template” link to download the sample template (CSV File).
-
Open the template, enter your visitors and save.
The first row is provided as an example and should be removed!
-
Click “Choose Visitor File” to upload the visitors.
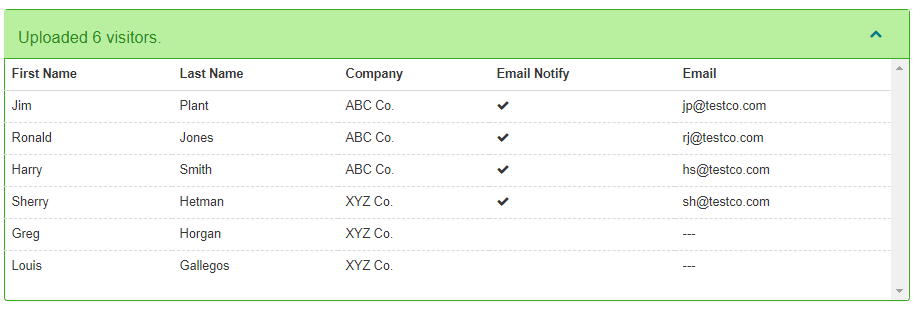
- The visitors have been successfully uploaded and visit registration can continue.
Visitor Registration via Mobile Device/Tablet:
The same visitor registration process can be followed to register visitors from a mobile phone or tablet. Simply log into the web page from an IOS/Android/Windows device to register visitors.
While there is no mobile application for GUEST it is possible to use the system via the mobile web page. Depending on the mobile device used, the page can typically be bookmarked and/or saved directly to the desktop of the mobile device.
-
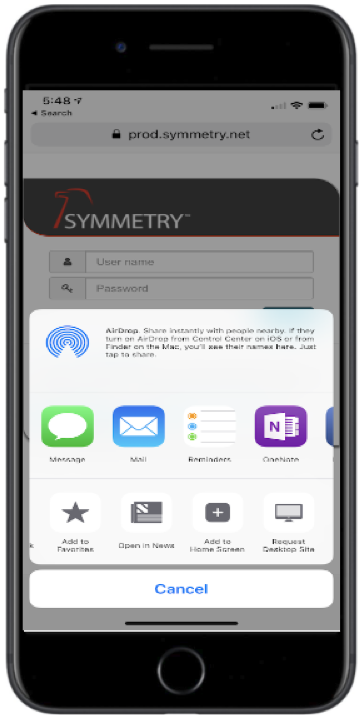
Using an Apple (IOS) device, open the GUEST web page in the Safari web browser.
-
Click the icon at the bottom of the screen to display additional options, then click “Add to Home Screen” to save the page to the desktop of the phone.
Safari (or Google Chrome) can be used to register visitors from an IOS mobile device. Google Chrome is the recommended web browser for Windows/Android mobile devices.
Visitor Registration via Outlook/Google Calendar:
Visitors may also be registered directly from an Outlook or Google Calendar, simplifying the registration process and removing the need for the user to log into the GUEST web application to register their visitors.
The host user simply adds a meeting onto their calendar with the names and email addresses of their visitors and includes “Symmetry GUEST” on the calendar invitation (the email address to use is available to all users on the GUEST Dashboard).
GUEST will receive the invitation and automatically register everyone on the invitation as visitors.
For the Outlook or Google calendar invite, the user must be an active Host/Host Delegate in GUEST, or the meeting will be rejected.
For more information regarding visitor registration via a calendar application, please refer to the GUEST Calendar Integration section within this guide.

